Archives for the month of: November, 2011
Painting shows lunch buffet at Mabel Dodge Luhan House, Taos, NM.

Lunch at Mabel’s. 12″ x 12″ Gouache and watercolor pencil. Sharyn Dimmick.

One of ways I become a better cook is to learn from cooks with greater skill and different repertoires than I have: once such cook is Jane Garrett who cooks at Mabel Dodge Luhan House in Taos, New Mexico. On my most recent visit there on a snowy November afternoon Jane served a lunch that struck me as perfect for the season and the weather: marsala mushrooms over polenta served with fresh figs in a balsamic reduction. She accompanied this richness with a simple pan of roasted root vegetables and a lemony salad made of raw baby chard and radicchio. I no longer remember what we ate for dessert because it was the lunch dishes that captivated me.

I begged Jane for the recipes to share with you. She graciously obliged. I brought them home with me. I went out and bought a bottle of dry Marsala. Alas, fresh figs had disappeared from my Farmers’ Market: I bought some dried figs from Trader Joe’s and contented myself with mushrooms from the mushroom vendor. We keep polenta. The Riverdog Farm box yields plenty of leeks. I had all of the spices and herbs on hand.

I made three of the four lunch dishes for dinner tonight (We had no salad ingredients but romaine lettuce).

Because I was using dried figs, I began with the balsamic syrup, using the only balsamic vinegar I had on hand, a blackberry-vanilla blend I couldn’t resist a few years back: the small bottle sat at the back of our cooler cabinet, waiting for a compelling recipe. To make the syrup, combine

1 and 1/2 cups sugar

1/2 cup water

When sugar has dissolved, add

1/2 cup dark balsamic vinegar

1 cinnamon stick

1 piece of star anise

2 black peppercorns

1 allspice berry (I used about 1/2 tsp of ground allspice, being out of fresh)

rind of one orange, with juice (again, I faked it here, substituting some candied orange peel)

a few branches of dried thyme.

Jane says to simmer this for five minutes: since I was using dried figs I popped them into the syrup and let them simmer at very low heat while I cooked everything else.

I should have prepared the roasted vegetables next, but I chose to wipe about 3/4 of a pound of brown mushrooms first and clean 1 leek.

I sliced the leek into thin rings, put them through two changes of water, and skimmed them off to saute them in a skillet with olive oil and butter. While they cooked, I sliced the mushrooms, tossing any broken pieces into a stock pot with the trimmings from the leeks for vegetable stock.

When the leeks were browned, I transferred most of them into a bowl, added more oil and butter to the skillet and sauteed my mushrooms in two batches. I put one batch in with the leeks and left the other in the skillet on low heat. I splashed in some marsala and it all evaporated, so I waited and then added some more (Jane says to add it to taste and then thicken your sauce with cornstarch and vegetable stock). Then I put the other mushrooms back into it with just a few of the sauteed leeks and set the skillet aside so that I could prepare the vegetables I should have done earlier.

The vegetable compartment yielded parsnips, rutabaga and turnips. I peeled them, cut them bite-sized, more or less, poured a little olive oil in the palm of my hand and rubbed the vegetables with that on a sheet of foil in a roasting pan. I seasoned them with only a little black pepper — the other components are highly seasoned and I wanted the vegetables to contrast with the other elements. I put the parsnip tops and tails into my stock pot. As an afterthought I cut open a delicata squash and scooped  the innards into my stock pot, added water and a few branches of thyme and started simmering the stock. I put the squash cut side down in a loaf pan I had rubbed with oil and put all of the vegetables into a 375-degree oven.

Then I made polenta: 1 cup of polenta to 4 cups of water and 1 tsp salt. Bring to a boil, stir regularly, and cook until thick.

All this time, my figs were simmering and my stock boiling, then simmering.

When the vegetables were almost done, I pulled them out of the oven and nuked them for two minutes in the microwave with a quarter cup of the unfinished stock — I did this because the rutabaga had been large and tough.

Then I heated up the mushrooms, made some liquid cornstarch by shaking cornstarch, stock and a bit of marsala in a small jar, scooped in a couple of teaspoons of the fig syrup and cooked the mixture for a few minutes.

Jane mounded her polenta in a serving dish, put the mushrooms on top and the balsamic figs around the sides. I kept the figs separate and instructed Mom to dish herself a pile of polenta, top it with mushrooms and eat the figs on the side if she wanted any. She did.

We both agreed that this dish would be better with the fresh figs that Jane had used, but it is the other end of November from when Jane made it — if you live in the Southern hemisphere, please make this with fresh figs, as I will earlier next fall. On the other hand, the balsamic syrup has a future on bowls of oatmeal and coffee ice cream, maybe on polenta pancakes!

Food Notes: Use fresh figs in this dish if they are available. Use any roastable vegetables you have on hand: carrots would be good, sweet potatoes, celery root. Use any kind of mushrooms you like, or a mixture of varieties. The Kensington Wine Shop says to buy “the good stuff,” dry marsala from Italy — apparently we don’t know how to make good marsala in California yet. Serve this with an acidic green salad if you possibly can — it takes the meal up a notch — but if you are fresh out of salad makings, make it anyway. You won’t be sorry. And if you get to Mabel’s, stop in and say “Hi” to Jane.

P.S. There was a little polenta left after the mushrooms were gone. This morning I mixed in an egg, some flour, some milk, a little sugar, 1 tsp of baking powder and a bit of vanilla and had some polenta pancake batter — apparently, I know how to do this without a recipe now. I ate the pancakes with some of the fig syrup — delicious!

Painting of turkey, noodles and ingredients.

Turkey and Noodles. 12″ x 12″ gouache and watercolor pencil. Sharyn Dimmick.

My Grandma Carroll, who contributed the rolls to so many of our holiday dinners, was famous for her chicken and noodles — it was probably the best dish she made and the one everybody wanted the recipe for — but she didn’t want anyone to best her at her star food. When my mother asked her how she made them, she said, “Oh, you just take an egg and a cup of flour.” She neglected to mention the other two eggs or extra egg yolks she always added. So Mom went home and made them and they were impossibly dry.

The next time we went over to Grandma’s house, my Mom said, “Mother, do you only put one egg in your noodles?”

Grandma turned her head to the side and started giggling.

“Well, if you have another egg…,” she said.

My mother finally figured out that the correct ratio was three eggs to one cup of flour, or an egg and as many extra egg yolks as you had from some other cooking project.

You add the flour (seasoned with 1/4 tsp of salt and 1/2 tsp of paprika) to your eggs or egg and yolks and knead it for awhile until it is spongy. Then you roll it out as thinly as possible on a floured cloth.

Now you have a choice. You can cut your noodles and have them “soft,” or you can let the rolled out sheet of dough dry out for a day, depending on how much advance planning you have done. Our family prefers noodles that have dried for a day — that’s what Grandma made.

I watched Mom make these yesterday. She cut the dough in half before she rolled it out, so, one cup of flour and three eggs make two sheets of noodles. Then she set them on a tea towel to dry with a sheet of paper over them. Several hours later she replaced the paper with another tea towel. Grandma used to hang sheets of noodles over the top of her swinging door and I have seen Mom hang them in ingenious ways in the past, but she doesn’t do that anymore — now she dries them flat (If you hang your noodles they may dry better because they’ll get better air circulation). This time we let them dry overnight.

Whenever you cut them, roll each sheet of dough up like a jelly roll and cut them in thin strips: remember that noodles expand in the broth that you cook them in, so cut them thin.

Grandma most often made chicken and noodles cooked in chicken stock: she would cook a chicken in water, bones and all, remove the chicken, take some of the meat off the bones, boil down the cooking stock and cook her noodles in it. But if she had turkey leftovers, she would boil up the turkey carcass, neck and giblets for stock, reserving some turkey meat, and cook her noodles in that. When we make stock, we add in ends of carrots and celery for extra flavor. We strain the stock and remove some of the fat.

Mom says it is important to leave some fat in the stock so that you will not have a flat flavor. I say you have to have some salt in the stock to avoid the same flat flavor — if the noodles taste flat I either add salt at the table, or eat them with Tabasco sauce. Mom says that Grandma also added some butter to her stock before adding the noodles. For best results, heat the strained stock to a full rolling boil, drop noodles into it a few at a time and cook the noodles in the turkey (or chicken) stock until they are soft (from fifteen minutes to half an hour. At this point, season with salt and pepper to taste, add 1 Tbsp of butter and then add your reserved meat until it is just heated through in the noodles.

These noodles improve over the next few days: you might consider them to be second generation leftovers.

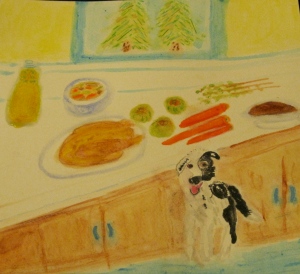
Painting shows ingredients for turkey-apple stew, plus a border collie.

Turkey-Apple Stew. 12″ x 12″ gouache and watercolor pencil. Sharyn Dimmick

The day after Thanksgiving we are happy campers: we camp in our house. We have leftover rolls. We have leftover pie. We have leftover roast turkey, cranberry sauce and a few extra baked yams. Sometimes we have mashed potatoes and brown turkey gravy. When we get hungry, we grab a roll, heat up a slice of pie, filch some sliced  turkey off the platter. But when we get tired of grazing, sometime in the next day or two I make turkey-apple stew, employing leftover turkey, gravy and stock, with the additions of carrots, apple cider and fresh apples. I have to keep an eye on the gravy supply and make sure I make the stew before my brother feeds the gravy to Ozzy, the border collie. We make a rich, dark brown gravy from the drippings in the roasting pan, flour and water, and Ozzy loves to come for Thanksgiving.

What I use to make the stew is mostly dark meat. I strip it from the thighs and drumsticks, throwing the bones and sinews into the stock we started Thanksgiving day with the giblets, odd pieces of celery, any unwanted skin. Eventually, we will strip the entire carcass and throw it in our biggest pot for stock. We will probably make turkey and noodles with that, but stew comes first in the post-Thanksgiving rotation.

I begin by slicing apples and cutting carrots into batons. I use four apples and three carrots, usually, but you can adapt this to your own tastes. I don’t peel the apples. Because my Mom does not like eating pieces of onion, I will cook a small, peeled onion whole in the stew and remove it before serving. If you like pieces of onion, go ahead and add a cut -up onion or two to your stew.

Saute 3 carrots, cut into batons and

4 sliced apples (and optional onions) in a few Tbsp of olive oil and butter.

Sprinkle vegetables with dried thyme (stripped from five or six stalks)

When vegetables begin to brown,

Add some turkey stock and 1 cup or so of apple cider (I saute the vegetables in a standard skillet and add stock and cider until it is full). If you want it more savory, use more stock and less cider. For a sweeter stew, reverse the ratio.

While vegetables simmer, strip your turkey and cut it into pieces you can put in your mouth.

Put turkey pieces in your pot of leftover gravy (If you don’t have leftover gravy, you’re screwed as far as this recipe goes unless you can scrounge up some brown drippings and make some more. In a pinch, you can thicken stock  with flour, but it will be a pale imitation of the real thing).

Heat the turkey in the gravy, as you would for hot turkey sandwiches. When vegetables are tender, add vegetables to turkey and gravy. Taste and season. I like to add Tabasco at this point — just a little. You might prefer salt and pepper. Nutmeg is a nice addition, too, and I can imagine that ginger might be good. The original recipe (published years ago in the San Francisco Chronicle’s magazine) calls for adding cream. Sometimes I throw in just a splash of half and half to round it out, but it is not strictly necessary.

I have served this plain in a bowl to eat with leftover rolls. I have served it over rice. I have served it over soft polenta. You could even eat it over mashed potatoes.

Food notes: You can, of course, make this stew with white meat if that floats your boat. For goodness’ sake, please don’t make it with cream gravy — even gravy mix is better than that. In our house when the gravy supply is low, we extend it with brown fluids: coffee has been used, or Kitchen Bouquet, or meat drippings from some other meal.

You can gussy this up by adding cream or half and half to your taste. If I have brandy, cognac, applejack or hard cider I’ll toss a jigger in with the apple cider and stock. If your sauce is thinner than you like, you can make a quick roux of flour and butter to thicken it — we usually reduce our gravy to save it so mine doesn’t need any additional thickening. If you have parsley on hand, chop some finely for a beautiful and flavorful garnish. If you want to be the next Martha Stewart, carve some crab apples into fancy faces, roast them and garnish with that. Don’t tell Martha I said that.

Happy Thanksgiving, everybody! See you next week.

Painting of ingredients for improvised gumbo -- Davis pepper spray incident in background.

Mumbo Jumbo Gumbo. 12″ x 12″ gouache and watercolor pencil. Sharyn Dimmick

Yesterday in the farm box from Riverdog Farm I got four green peppers. Green peppers are not my favorite peppers by a long shot — I love red, yellow, orange and even purple peppers, but green ones? I think someone made a mistake….

The only way I can think of to get excited about green peppers is to cook Cajun food. In Cajun country, they call green peppers, onions and celery the holy trinity (capitalizing it would be blasphemous) and put them in everything except dessert. Mom expressed a wish to have a little more room in the freezer before Thanksgiving so we decided to have a look at what was in there. Don’t you hate it when you read that someone has whipping cream and brandy lying around? Not around here: I found the shrimp shells that I had been saving for stock, along with one small piece of cooked fish for future bouillabaise. The only other meat in there was sausage. O.K. We’d have sausage gumbo.

First up I roasted the last three small tomatoes sitting on the counter. The farm had a frost this week so there will not be anymore fresh tomatoes unless my Sun Golds ripen on the vine before it rains or freezes here. Tomatoes were late this year and have compensated by lasting into mid-November. Goodbye fresh tomatoes. See you next June or July.

As the tomatoes roasted in the oven where I was baking Krista and Jess’ gingerbread baked oatmeal, I diced

2 green peppers

2 small onions

2 stalks of celery and

1 bulb of fennel (just because I had it)

Before I sauteed the vegetables I chopped

fennel stalks and leaves

and put them in a big pot of water with

shrimp shells and leftover fish fillet.

Then I sauteed the vegetables in olive oil. When they began to brown I added most of

1 small can tomato paste (also a refugee from the freezer) and

1 pint frozen chicken stock.

I strained the shrimp and fennel stock into the vegetables, tomatoes and chicken stock and considered Cajun seasoning. While I thought about it I added

1 Tbsp hot paprika

dried thyme (I stripped several branches)

a few grinds of black pepper,

Then I set to making a roux:

I cut 3 sausages into coins and browned them in the former stock pot, before adding them to the gumbo. To the sausage drippings, I added

1/2 cup flour

3-4  Tbsp olive oil

I patiently cooked the roux to the color of peanut butter, adding some water, liquid from the gumbo, or chicken stock when it stuck, scraping the pan as best I could. I probably added another 3 Tbsp of chicken stock all told.I added the roasted tomatoes to the gumbo and squeezed the juice from half a lemon. I let the roux cook in the gumbo for a few minutes while I started rice — white rice because it was almost lunch time. My picky brother Bryan came through the kitchen about then and said, “Do I smell lasagna?” I said, “Gumbo, but it has a lot of the same ingredients as lasagna” (sausage, onion, tomato).

When the rice was done I got Bryan a tiny bowl of gumbo to try.

He said, “It tastes kind of like beef stew.”

Huh. Well, it has onions, celery and a touch of tomato paste, I guess. Anyway, he ate it and we ate it and it is good.

This gumbo is a fine example of how I cook most of the time, inspired by an ingredient I don’t like much to create a dish from a cuisine I do like. Green peppers compel me to cook Cajun food. What was in the freezer (shrimp shells, chicken stock, leftover cooked fish, tomato paste  and sausage), in the refrigerator (fennel and celery) and on the counter (tomatoes and onions, half a lemon) provided the other ingredients. Karen of Carolina Locavore recently referred to this as “vegetable triage.” I didn’t use a recipe except to check the oil and flour ratio for the roux (which I then did not follow: it said 1:1 for flour and oil). I let my memory guide me in terms of what goes into gumbo: many fancy cooks make gumbo, but the people I worked with at Berkeley Rec would make gumbo with turkey backs and neck bones if that is what they had — a lot of gumbo comes about because you are using this and that. You can’t go wrong with a fish or chicken stock, a good dark roux and the holy trinity.

Food notes: If I had had a can of clams in the pantry that would have gone into the gumbo. If I had had shrimp in the freezer, or chicken, it would have made it into the pot, too. I drew the line at cooked bacon — Mom said I would have to taste it and I decided to pass. I didn’t add bay leaf or Tabasco (but I could have if I weren’t too lazy to go pick a bay leaf from the backyard). Gumbo gets hotter as it sits, so I kept the spicing moderate — if you like it hotter, go for it, use andouille sausage, or pass the Tabasco at the table.

Political Note: Like many other people I watched the videos of Officer Pike using pepper spray on demonstrators at U.C. Davis. The spray was a fierce orange-red, fired at point-blank range on nonviolent people. I was shocked to see this. I commend officers who did not engage in or condone such behavior and the protesters who remained nonviolent. Save the peppers for Tabasco, which should only be eaten voluntarily, not sprayed down people’s throats as they participate in peaceful assembly.

Photo note: If any of you artistic types out there know how to square up a photo of a painting, I’d surely appreciate some tips.

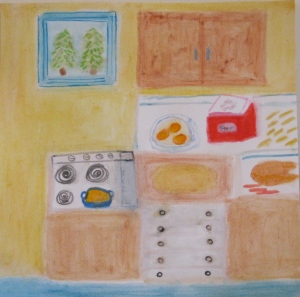
painting of my Grandmother's Kitchen

Grandma’s Kitchen, El Cerrito, CA. 8″ by 8″ Watercolor pencil and gouache. Sharyn Dimmick.

My Grandma was not a great cook — maybe not even a good cook: she was a home cook who fed threshing crews, a husband and seven children on very little money. But she could make bread: my Mom remembers her making bread in a huge dishpan, four loaves at a time. She made jam, too, and I am sorry not to have her recipe for berry jam (she died before I got interested in canning) — I don’t know what kind of berries she used. Not strawberries, but maybe blackberries and raspberries together? I don’t know. She made excellent chicken and noodles and a nice cocoa cake. On holidays she brought the rolls.

Mom made rolls, too, but not for Thanksgiving or Christmas. She liked to make “bread rolls,” a less rich roll dough. She liked to use dried milk. Grandma always used fresh milk and scalded it. She warmed the flour and the eggs. She used oil rather than shortening or butter.

After Grandma died at ninety-six, I took over her roll-making job: I make yeast-risen oil rolls. I make cloverleaf rolls in a muffin tin greased with Crisco because that is what my Mom always did. The recipe comes from Grandma. The shape comes from Mom. My contribution is sometimes to sneak in a little whole wheat flour, but everybody else likes it better if I don’t: the consensus is that we should be allowed to eat white flour on holidays, along with pie and gravy and stuffing and whipped cream. “It’s only for one day,” Mom says. Two, if we’re counting Christmas, but hey, why be literal-minded?

Here is my grandmother’s recipe for rolls.

Scald 1 cup of milk and pull off burner to cool.

Dissolve 4 and 1/2 tsp of yeast (two packets) in 1/2 cup lukewarm water by sprinkling the yeast into the water in a one-cup liquid measuring cup and beating it with a fork

To the scalded milk, add:

1/4 cup sugar

1/2 tsp salt

1/3 cup corn oil. You can add this stuff while the milk is still warm — it will speed the cooling.

While the milk is cooling to lukewarm, if you want to imitate my grandmother you need to warm the flour and eggs. This is how you do it.

Turn on your oven to warm or low. Measure 5 cups sifted flour into a glass, metal or ceramic bowl. Bury 2 large whole eggs in the shell in the flour. Turn off the oven. Set the bowl in the oven for a few minutes until the flour is warm to the touch. This is a good trick for cold kitchens: the warmed flour gives the yeast a little boost.

Remove eggs from flour (or just take 2 eggs out of your fridge) Beat the eggs until blended and whisk them into your milk-oil-sugar mixture. Pour liquids, including eggs over flour. Add dissolved yeast.

Knead until dough is uniform, soft and spongy — about ten minutes by hand. The dough should be soft and light, but not sticky. If it is a humid day, you might have to add more flour, but you only want to do that if it is impossible to knead.

Cover your bread bowl with a warm, damp tea towel (I like linen and find that dampening it and microwaving it for twenty seconds gets it warm enough).

Set bowl in warm oven (warm from before — your oven should not be on at this point) or other warm draft-free spot. We have been known to run our clothes dryer for awhile before turning it off and setting the covered bowl of dough inside to rise. Let dough rise until double — I’m going to say an hour, but you need to go by volume rather than time.

Punch dough down and let it rise again. This will take half the time of the first rise.

While dough is rising the second time, get out your Crisco vegetable shortening that you bought to make pie crust. Grease two normal-size 12 cup muffin tins or 1 12-cup muffin tin and one 6-cup one. This recipe will yield eighteen to twenty-four cloverleaf dinner rolls, depending on how big you make them. If you have extra dough, plop it in a small greased bowl and make a bun.

When dough has doubled again, punch it down and form cloverleaf rolls by pinching off three balls of dough. They should be about the size of the circle you make with your thumb and forefinger, unless you have huge hands, in which case they can be a little smaller. Place three balls of dough in each greased muffin cup: as the dough rises and spreads it will fill the muffin tin and leave you with rolls.

While your rolls complete their last rise, go ahead and preheat the oven to 425 degrees. Do not put the rolls in it yet. The rolls are ready to go in when they have risen above the edge of the muffin cups.

Bake rolls in 425 degree oven for 10 to 12 minutes. Serve hot — or at least warm. You can eat them cold later — and you will, if there are any left. We eye them jealously and fight for our share. Sometimes we make more during the holiday weekend if we feel we have been shorted.

Food Notes: These rolls are simple and good. You can add a touch of butter to the milk mixture if you like. You can also substitute up to 1 cup of whole wheat flour for unbleached flour or bread flour — add more than that and you will lose their marvelous lightness and beautiful creamy color. My brother would say just lose the whole wheat flour altogether and my Mom would say to hold it to a quarter cup. You can, of course, use only one packet of yeast or 2 and 1/4 teaspoons — if you do, things will just take a little longer: these rolls take me about two and a half to three hours total time.

Painting of orange on plate in Mabel's dining room, Taos, New Mexico.

First Orange. 8″ x 8″ watercolor pencil and gouache. Sharyn Dimmick

I ate my first orange of the season this morning, the first one I’ve had since March. The fruit plate at breakfast In New Mexico has been full of melons: I know they can’t be seasonal — not watermelon anyway. Today I turned first to the stewed prunes. I had two, but they were cold. Then I saw oranges in the fruit bowl and went up to investigate. The first orange was large. sporting a blue and white label: I squinted and read “Australia.” I put it back, but now I wanted an orange. I found a small one with no sticker. I took it, hoping it had been trucked no further than California where I live, two states away.

Taking it back to the table I peeled it with my fingernails and then used a knife to get under the thick white pith, losing a little juice as the knife pierced the flesh. Wiping my hands on my napkin, I removed the navel and separated the first segment from the broken halves.

It tasted like sunshine: winter sunshine — a little sweet, acid, radiant in my mouth. I understood for the first time how my mother felt in Canada and Illinois when she got an orange in her Christmas stocking: how wonderful it must have tasted in the dead of winter when they were rare.

Mom has never lost her taste for oranges. We argue about them. She wants them in August and September when it is not orange season. I remind her that in January, February and March we will be inundated with citrus: I spend March making tangerine curd to eat on angel food cake, devising citrus dressings for salads, drying and candying citrus peels. We make Swedish rye bread in the winter with orange zest and fresh juice.

When Mom moved to California in 1944 she said you could buy oranges everywhere: from roadside stands, from trucks on San Pablo Avenue. She bought an orange juicer — not an electric thing, but a press with a screen and long handles: you bring the handles together and squeeze halved oranges or lemons between metal plates. The screen catches the seeds and the juice falls into a reservoir below with a pouring spout. It does not work well if you have removed the peel for zest or candying — it was designed for halved citrus, squeezed whole.

I have never been partial to the standard American trio: apples, oranges and bananas, sitting on the counter year-round and incorporated into every fruit salad and lunch box. I eat apples in season, drying them for the winter and giving them up when they come from cold storage. I like oranges when I am hiking and fresh food is scarce, or when, like this morning, I take a walk in thawing snow: I walked to town to get a coffee, walked back in time for morning meditation, craved fruit at breakfast. The orange tasted like lost gold recovered, what explorers had been looking for as they sailed around the world.

Oh, you’ll want a recipe. Alright. This is how to candy citrus peel: orange, lime, tangerine, lemon, or grapefruit. I started doing this when I got interested in using the whole fruit: if I’m not zesting citrus fruit there is all of that peel left over — why not turn it into winter sweets? Home-candied peel bears no resemblance to that nasty glaceed mixed fruit you find in the store. I chop candied peel into breakfast muffins, use it in orange French toast, or eat it straight out of the jar when there are no sweets in the house and I want a little something. Sometimes I save mixed citrus peels in a bag in the freezer: when I have a lot, I take them out and candy them all at once. It’s best to use organically-grown fruit for edible peel, but if you only have commercially-grown citrus available, be sure to wash it with dishwashing liquid and water, rinse it and dry it before peeling so that you are not ingesting any unwanted chemicals.

Here’s what you do. Peel a lot of citrus fruit or take your bag of saved peels from the freezer. You can candy several types at once — you don’t need to separate them. If you are peeling fresh fruit, score the peel into quarters with a knife: this makes it easier to peel.

Place your peels in a large saucepan of cold water: you want 2 cups of water per eight limes or lemons, six tangerines or oranges, or three grapefruit. Bring peels to rolling boil. Drain them. Start again with cold water. Repeat. The thicker the peel, the more times you should blanch it — grapefruit peel takes at least four times,

Cool the peels and scrape the white pith from them with a knife or the side of a spoon, being careful not to break the peel — if it breaks, you can’t brag about it, but it is no tragedy — you’ll just have some smaller pieces. Cut the peels into strips.

Now return the peels to your saucepan with equal amounts of sugar and water — say 2 cups each. Bring to a simmer and cook without stirring until peel is translucent. This takes about an hour. If you are a thermometer-wielding type. Alice Medrich says to get the syrup to between 220 and 222 degrees.

Remove peel with slotted spoon and cool in a single layer on a rack over a baking sheet (the peel will drip for awhile).  We set ours in our oven overnight. When peel is dry, dredge it in sugar and store it in sugar in a glass jar in your refrigerator. If you make enough it will last you until citrus comes in again the following year. It makes great gifts, too. People have been known to dip it in chocolate or caramel.

The Kale Chronicles’ Food Manifesto: Ideas I Try to Live By

painting of foods for four seasons

Seasonal Food 6″ x 6″ gouache and watercolor pencil. Sharyn Dimmick

1)   Eat fresh, locally-grown food in season.

Fresh food tastes good. It has more vitamins and minerals in it than preserved food. If you can grow your own food, go for it. If you can’t, seek out farmers’ markets or a community-supported agricultural program. Familiarize yourself with what grows in your area when.

2)   Adapt recipes to use local resources.

For instance, pesto recipes often call for pine nuts. Here in the Bay Area of Northern California, pine nuts are currently selling for thirty or forty dollars a pound. I make my pesto with walnuts, which grow in California and can be found at my local farmers’ market in bulk. If you live in an area that produces almonds, hazelnuts, black walnuts, macadamia nuts, Brazil nuts, substitute them for pine nuts. Eat pine nuts when you go to Italy or visit New Mexico.

3)   Use what you have on hand.

Instead of running out to get ingredients, practice cooking with what you have on hand. Develop a regular routine for food shopping and stick to it. You will save time and money if you are not always running to the store and you will develop your creative cooking muscles. Mom shops for groceries once a week at a variety of places (Safeway, Grocery Outlet, Food Maxx or Country Cheese). I pick up a box of vegetables in Berkeley on Wednesday afternoons and often go to the Saturday Farmers’ Market.

4)   Do not waste food.

We spend money for food and then we throw it away when it is less than perfect or past the pull date. Many people frequently throw away food that can be eaten. A routine throw-away is sour milk (or half and half, or cream), or, worse, milk that has just passed its pull date. Sour milk, cream, etc. can be substituted for buttermilk in recipes that involve cooking or baking. Sour milk can also be “sweetened” with baking soda and then used in cooked or baked recipes meant for fresh milk.

painting shows dehydrated and canned food for winter

Food for Winter 6″ x 6″ gouache and watercolor pencil. Sharyn Dimmick

5)   Find simple ways to preserve foods for winter.

I bought a dehydrator a year and a half ago. Now I make my own dried tomatoes which I use during the winter in soups, pastas and salads. I have also dried apples and pears and I’m just getting started. With trepidation I learned how to put up dilly beans, a baby step into home canning. When I make pestos or curry pastes, I put part of the yield in the freezer for later.

6)   Develop a personal pantry based on what you like to eat and ingredients you use frequently.

For example, I am a baker as well as a cook, so I stock a baking pantry with flours, sugars, molasses, honey, maple syrup, vegetable shortening, oils, nuts, coconut, dried fruit, yeast, and leavening agents. I cook Chinese food so I keep soy sauce, peanut oil and chili paste with garlic, fresh ginger. I cook Thai food so I keep fish sauce. A pantry rich in canned tuna and white beans would do me no good because I am not going to cook with those ingredients, or canola oil, which tastes like fish to me, but I do keep lots of pasta, polenta, rolled oats, dried tomatoes, kalamata olives.

7)   Stock your pantry when you find good deals on things you use often.

We are infamous for buying canned sour pie cherries by the case. We like cherry pie. Sour cherries make the best pies. Canned cherries keep. So when Grocery Outlet features canned cherries we buy a case at a time. We keep them in the garage. We have learned the hard way that inexpensive pie cherries are hard to find, so when we see them we buy them. We also stock up on sugar, flour, butter, pastas, and miscellaneous canned goods when they are on sale.

painting shows stock pot, skillet and ingredients.

Making Stock 6″ x 6″ gouache and watercolor pencil . Sharyn Dimmick.

8)   Learn to make stocks.

You don’t have to go to cooking school for this. You don’t have to roast bones (although roasted bone stock is supposed to be good). The Greens Cookbook has wonderful recipes for vegetable stocks, which I recommend. But any old person can plunk a chicken or turkey carcass into a pot of water with some vegetables or vegetable trimmings (the ends of carrots, tough ends of celery, celery leaves, cilantro roots and stems, the skin of roasted winter squash), simmer it, strain it, skim of the fat and, voila, a base for soups, sauces, chicken pot pie, Chinese stir fries. For me, chicken stock is indispensable. We keep it in pint containers in the freezer.

9   Develop your cooking resources.

I learned to cook by cooking with my mother and asking questions about what she did, but I also learned by tasting lots of foods, watching cooking shows on PBS, reading cookbooks and having conversations with others about food, especially people whose cooking I liked. We keep an old Betty Crocker picture cookbook as our cooking Bible. I have bought the cookbooks of several of my favorite restaurants: Ajanta, Henry Chung’s Hunan, Greens, and Chez Panisse (I really like the Chez Panisse Desserts cookbook, which taught me how to make fruit caramel and variations on fruit curds and has a good section on seasonal fruit in California). I keep a large binder of recipes from the food sections of two newspapers, organized by main ingredient or type of food: Carrots, Chocolate, Cookies, Corn, Fennel, Fish, Lemons, Pancakes, Pasta, Peppers, Pumpkin, Soup, etc. I browse through it when I’m trying to remember what I cook with savoy cabbage or looking for that fabulous Polenta Pancakes recipe from Mark Bittman. I also search online when I need more ideas and subscribe to more than a couple of food blogs.

10) Don’t be afraid.

Remember, cooking is fun. It is a sensual experience standing in front of a cutting board with the smell of fresh basil wafting through the air, hearing the snap of green beans as you trim them, seeing the colors of eggplant, peppers and peaches sitting on the counter. If you are not sure how to do something, you can always consult a cookbook, watch a video online or call another cook on the phone. If you tackle a technique or dish you have never attempted you might want to follow instructions carefully the first time around, but once you learn some cooking principles and the rules of substitution you will be freer to cook what you have and turn it into what you like.

painting of sour cherry pie, cherry syrup and ingredients

Sour Cherry Pie (Detail) 12″ x 12″ gouache and watercolor paper. Sharyn Dimmick

How can cherries be a part of seasonal cooking in November when I don’t live in Australia? When the weather turns cold we turn to preserved foods. We still have apples on our backyard apple tree, but Mom asked me to roast a pork loin and some squash while she and my sister-in-law Barbara scrubbed and taped walls for painting (I know I got the better part of this division of labor). Because I am supposedly getting ready for a week away, I wanted an easy pie with no peeling and paring, no slicing, so I went for the canned cherries in the garage. These are pitted sour cherries canned in juice. Mom had made crust earlier in the week, so it was pie time again. And while I’m at it, I’ll just say that I have made fresh sour cherry pie from some sour cherries I scored at the Ferry Plaza market in San Francisco and — drum roll — we prefer pie made with canned sour cherries.

Here is how to make cherry pie — my cherry pie.

Make the crust first. If you make Madge’s recipe, you will have enough crust for two cherry pies, so you can pit my cherry pie against your favorite recipe, double the filling recipe and make two cherry pies from this recipe or save the extra crust for quiche or apple pie. Our recipe is handy at Thanksgiving and Christmas when you are baking lots of of pies, but. truth to tell, pie is never a problem here: we’ll eat it for breakfast, dinner, lunch and tea.

Once again, the no-rant version* of pie crust for your convenience:

Cut 1 cup of vegetable shortening plus 2 Tbsp of butter into 3 cups of unbleached flour and 1 tsp salt  until the mixture resembles small peas. Do not overwork the dough — you want to see streaks of fat in the raw dough: they will melt while baking and create flaky crust. If you use salted butter, you can reduce the salt to 1/4 tsp.

Into a 1-cup liquid measuring cup, break 1 large egg. Beat egg with fork until blended.

Add 1 Tbsp cider vinegar to egg and stir. Then add water until combined liquids measure 1/2 cup, plus a little more.

Add liquids to shortening and flour and work just until combined. Pat dough into a flattened circle. If you are a novice pie baker, you may want to wrap the dough in waxed paper and chill it for awhile. The intrepid and experienced can divide the dough in half and proceed by cutting one half-circle in half again — this recipe makes four crusts, so half of it will give you the crust for your two-crust cherry pie.

Roll crust out on a floured work surface with a floured rolling pin. Roll firmly but lightly, being sure to roll all the way to the edges — you want the crust thin, but you don’t want to press it down and make it stick. You’ll figure it out — it’s not that hard. Try your best to keep the crust circular. Measure the crust by setting your pie plate on top of it, allowing for enough crust to cover the sides. Fold rolled crust into quarters to pick it up and unfold it again in your pie tin.

Now you have an aesthetic choice to make. For that classic lattice cherry pie you can roll your next quarter of crust into another circle and cut the crust into long strips, which you will lay crosswise over the filling later. If you don’t have the inclination to build a lattice, just take your circle and fold it into quarters, leaving it for the top crust later.

Go and preheat your oven to 375 degrees if using a Pyrex pie plate. If you use metal, you can start the pie at 400, but be on hand to turn it down after ten or fifteen minutes.

Now the filling:

Mix 1/4 cup cornstarch and scant 3/4 cup sugar in a dry saucepan. Whisk until blended.

Open 2 cans of sour cherries packed in water (Do not use cherry pie filling, which belongs on The Horror Roll). Drain the juice from the cherries into a 2-cup measuring cup — you will have about 1 and 1/3 cups. Leave the drained cherries in the cans for now.

Whisk 1/3 cup cherry juice into the cornstarch and sugar and stir with whisk until thickened over medium heat. The first sign that the cornstarch is working is the appearance of little shapes that look like ragged skin. If you don’t care for the pale pink color add the secret ingredient, red food coloring, drop by drop until you get a hue you like — I particularly recommend this option if you are going the lattice crust route or planning to take photos of your pie. When the mixture is thick and glossy add the reserved cherries, remove from heat and stir in

1 Tbsp butter and

a grating of fresh nutmeg

Pour the filling into your prepared pie shell and weave your lattice strips over the top, or plonk your unfolded top crust over the filling and make an attractive pattern of knife slashes for vents. Do not wash your saucepan yet! Place pie in oven. Bake for about 50 minutes or until crust is nicely browned and filling is bubbling.

Now, remember that other cup of cherry juice sitting in your measuring cup? You can drink it if you want to, which Mom does sometimes, but this is what I do with it: put it in your saucepan. Add some sugar — more than a Tablespoon, less than a cup. Turn the burner back on and boil it down until thickened — you want it to coat the spoon and be bubbly and shiny. Decant carefully into a glass jar (pour along a spoon or a knife if you are nervous — the metal absorbs some of the heat). Let cool and then refrigerate. This will keep indefinitely in a cold refrigerator. It is delicious on cornmeal pancakes, stirred into your morning oatmeal, over ice cream, with lemon pound cake …. You can also add some cream and cook it into cherry caramel — you’ll never drain cherries over the sink or throw out cherry juice again!

Let your pie cool while you eat dinner or make tea (at least fifteen or twenty minutes — the hotter the pie when you cut it, the more likely the filling is to run. We don’t care a whole lot about this, but for a prettier pie give it some cooling time).

Serve plain or a la mode.

*For the full rant on pie crust, please visit Gravenstein Apple Pie.

Food notes: For the full flavor benefit you must make this with sour cherries packed in water and scant the sugar as I do. For those of you stateside, canned sour pie cherries show up infrequently at Canned Foods Grocery Outlet — aka “Half Foods.” Some cherry pie recipes call for lemon — that will not be necessary with this pie. Please do not make it with sweet cherries (Bings, Burlats, etc.) — sour cherries have a different flavor, the ideal flavor for cherry pie in my opinion. Try them and see. If you are out of cornstarch, you can substitute flour: if you use flour, your filling will be cloudy rather than clear, but it will taste equally good.

On Kale: When I wasn’t making cherry pie, baking acorn squash with hot mustard, honey, lime and black pepper, roasting the squash seeds or boiling down cherry syrup I finally tried my friend Cathy’s version of kale with fresh walnuts and homemade raisins. The verdict at the table? “It’s still kale.” Back to the tasting laboratory…

I’ll be away for eight days starting Sunday sans electronic devices with which to entertain you or read and respond to your comments. Please make comments anyway if you are so moved. I’ll be back to coach you through your cherry pie crises well before the run up to Thanksgiving. I’ll also instruct the robot to give you a post to read on Wednesday while I am gone. Au revoir, dear readers. I’ll be back in person November 14 with stories to tell and perhaps a new recipe or two.

self-portrait of Sharyn Dimmick at Occupy Oakland with meditator and wolverine rolls.

Self-Portrait at Occupy Oakland with Wolverine Rolls. 8″ x 8″ gouache and watercolor penciil. Sharyn Dimmick

Last week was quite a week: I landed in Oakland, CA, for two days of vocational tests so that some poor soul can help me find a suitable day job. The testing center sat across the street and several stories above the site of “Occupy Oakland.” To get to my testing site by 9:00 AM I had to leave my house when it was barely light, loaded with reading material, pens, water, a thermos of milk and enough food for lunch and to get me through five hours of testing. I went back today for the third and final testing shift.

The first day I took sourdough bread, Cotswold cheese, an apple, two homemade spice snaps and a zucchini-gingerbread muffin. The next day I don’t remember what I took, but it was similar: apple, cheese, bread. I eat my lunch in the park where the demonstrators gather.

Monday I had off from testing and got to stay home all day. I took advantage of the hours at home to mix up some sourdough of my own, using recipes from my favorite bread book, The Cheese Board Collective Works (Read more about my most-used cookbooks here). Sourdough breads are made from wet, slow-rising doughs so it helps to have a whole day to make them.

I made a batch of wolverines, a round, part-whole wheat, sourdough bun, containing dried sour cherries, apricots and pecans (I used walnuts). The original recipe also calls for golden raisins (sultanas), but I see no reason to include them.

About now, you are either turning away in horror at the dried fruit, or you are hoping for the recipe. Alas, I must encourage you to buy your own copy of The Cheese Board Collective’s book because the instructions for making the sourdough starter alone take two full pages. Wolverines are made from a recipe called “Suburban Bread” (another full page), but they get their own page, too, and you also need to read the pages on shaping, working with sourdough and making sourdough in a non-commercial oven. Me? I’ve done this before.

Anyway, a “quick” batch of wolverines takes over nine hours if you already have your sourdough starter on hand. That I had — my “Cheese Board” starter gave up the ghost a couple of years ago, but I made a new sourdough starter from another recipe four weeks ago and have a healthy batch in the fridge that must be used weekly. I’ve been making “cowboy biscuits,” leavened with sourdough, soda and baking powder once a week, but Mom informed me on Sunday that she liked regular baking powder biscuits much better. Oh well. So I had the sourdough starter and we love wolverines. “We” love bread of all kinds (except perhaps sourdough biscuits and Irish soda bread), but we are particularly partial to crusty yeast-risen breads. I like wolverines so much that I ate two last night when they came our of the oven, had one for breakfast this morning, and took another for lunch today with some more Cotswold cheese. It is with the greatest restraint that I am not eating another as I type but am instead eating cold green beans with a bit of basil.

I ate my wolverine sitting on the ground in a sunny spot next to the bicycle lockers. The tent city was much larger than it had been on Friday afternoon and there were a lot of new booths and information tables. The Buddhist Peace Fellowship does sitting meditation there, so I sit with them after I eat my lunch while people talk, the wind blows, traffic signals send their audible walking calls, a clock tower chimes the half hour. I think about my blog and day jobs when I forget to focus on my breath or sounds or sensations. I “sit” on my backpack, pretending it is a zafu, putting it between my knees and sitting astride — it makes a pretty good substitute, although I can feel the lumps made by my water bottle and thermos.

Vocational testing doesn’t tell me much I don’t already know: I like writing, painting, singing and cooking. “About” page gives you more of the scoop on this. I’ll write for hire. I’ll teach writing practice for hire. I like to sell paintings. I sell music CDs too. I sit with the Buddhists for free and I cook for free. Long, complicated projects like wolverines don’t phase me because I like to take my time doing things and make things from scratch. Sourdough baking is a big adventure — if you love yeast baking and are up for a challenge, get yourself a good instruction book and go for it on a day when you can be home all day (or all night for you night-owls). If you don’t have sourdough starter on hand, you’ll need anywhere from three days to two weeks to mix it up and get it going vigorously. If you go for the Cheese Board book, you’ll find wonderful recipes for pizza and many quick treats such as muffins and scones in addition to the sourdough chapters.

Occupy Oakland is calling for a general strike tomorrow. I imagine the Peace Fellowship will be sitting there again. I will be “working” at home again and grateful to be there with my computer and my paints, a pot of black tea and at least one more wolverine.

Cowboy Sourdough Starter (adapted from The Cheese Board Collective Works and the “Rocky Mountain Sourdough Starter” recipe in The Book Lover’s Cookbook).

Get a glass jar with a non-rusted metal lid. Please note: this metal lid is the only metal object you will allow near the starter and you don’t want the metal to touch the starter. Big pickle jars are good. Punch several small holes in said lid, as though you want to keep something alive in the jar (You do!)

Place 1 and 1/2 cups unbleached flour or bread flour in the jar.

Add 1/2 cup whole wheat flour or rye flour

Add 1 tsp kosher salt.

With a wooden spoon, stir to mix well. Do not use metal while making or handling sourdough starter.

Dissolve 2 and 1/4 tsp  baking yeast (equivalent of one packet) in

2 cups warm water (not too hot or you’ll kill the friendly yeast)

Add dissolved yeast to jar and stir again with your wooden spoon until it is mixed well.

Place a folded linen or cotton smooth kitchen towel on top of your jar and set it in a warmish place where you can remember to stir it twice a day. You will be leaving it out for at least two or three days — remember, you want it to sour. Save the lid for later — you don’t need it at this stage. The towel allows your local yeasts that live in the air to join the yeast in the jar.

Check the starter twice a day. When it is bubbly and smells like yeast you can bake with it by taking it out cup by cup and adding it to biscuits, pancakes or yeast breads. Whenever you remove a cup of starter you need to add a cup of water and a cup of flour to the starter jar.

Sourdough starter is designed to be used once  a week or more often. You can store it in the refrigerator. Sometimes liquid separates and rises to the top. You can either pour this off or stir it back in. It will keep for months if you use it regularly. Watch out for mold (mine has never molded): if your starter develops visible mold or bad smells throw it out, wash your jar thoroughly and start again.