Archives for category: home cooking

In 1997 and 1998 I was sculpting large dolls — three feet high — out of porcelain clay and painting their heads, hands and feet. It was then that I acquired my painting palette, a cheap round plastic palette with a clear plastic top. This morning as I passed my desk I checked to see whether I had closed the palette properly and a large piece of brittle plastic broke off in my hand. I slapped some masking tape on the top and went on about my business, but the incident reminded me that I wanted to write about plastic.

painting shows grains, pulses and sauce stored in glass jars

Storage Jars. 6″ x 6″ Gouache on paper. Sharyn Dimmick.

Now, some of you will already be wondering why I didn’t immediately throw the broken plastic in the trash and go out and buy another palette, perhaps even a better one. The answer is two-fold: the lid that broke serves only the purpose of covering the paint so that it will stay moist and, with tape, still serves that purpose, but also plastic is problematic to dispose of properly and I feel it is best to limit plastic acquisitions whenever possible. The bottom of the palette where the paints sit is undamaged and I do not often have guests in my painting room, aka my bedroom. I also prefer to reserve what money I have for travel and other treats instead of using it to replace shabby possessions. If I did a self-portrait in the house jeans I am wearing right now it would tell you a lot about me: they have frayed hems and a side seam that is about to go on the inner thigh. I cannot remember when I bought them or at what thrift store but I can assure you that I have had them for more than five years.

Ahem. Why do I want to talk about plastic? Well, first of all, I read Beth Terry’s blog, My Plastic-Free Life, and follow her attempts to live free from plastic. She lives not far from me and does more than I will ever do to eradicate plastic from her life. I believe she is like a canary in a mine or a Cassandra we do not want to listen to as she chronicles the evils of plastic and its ubiquitousness. She goes to extremes that you might not want to go to — but you might: have a look at her blog and see what you think. She was talking about the amount of plastic packaging at Trader Joe’s the other day. Coincidentally, I had just stopped at Trader Joe’s for a couple of things (coconut milk, limes, dried apricots) and had had to make the unfortunate choice between limes coated with “edible wax” without packaging and organic limes in plastic netting. Which would you choose? Beth would tell me that the cans of coconut milk I bought are lined with plastic and frown that I would even consider buying apricots in a plastic bag. All I can say is that my Mom prefers apricots from Turkey to California-grown and Trader Joe’s meets her price point.

Painting shows refrigerator contents stored in paper, glass and china.

Refrigerator Storage. 6″ x 6″ Gouache on paper. Sharyn Dimmick.

I believe that people want to do the right thing and that the right thing varies according to person and situation. I also believe that many of us are wanton in our use of plastic, that we use it unthinkingly and discard it unthinkingly. Many a young person has probably seen little at the store that is devoid of plastic packaging: it is in my lifetime that we got plastic tamper-proof seals on every bottle of pills, plastic film on cottage cheese and yogurt cartons, plastic bottles of soft drinks, plastic bottles of drinking water. It is in my lifetime that Quaker Oats went from selling rolled oats in a cardboard carton with a string you pulled to open it to the current carton topped with two plastic lids (one you remove to open it, the other reseals the carton). In my lifetime, the Ziploc bag went from something that did not exist to a required item at airports.

I am fortunate to have learned some of the old ways: my grandmother taught me to place a dampened tea towel over rising bread dough and my mother to store leftover pie crust in waxed paper. Plastic wrap often seals poorly anyway, so you will see me rubber-banding paper, wicker plates, cardboard or tea towels over the top of bowls to bring dishes to potlucks. You will see me washing plastic bags and drying them on the line so that we can continue to use them to store food. Like many of you I carry a backpack and canvas totes to pack my food at the grocery store and farmers’ market. I have a marked preference for buying food in glass, which I can re-use, and cans, which I can at least recycle. We use ancient Tupperware around the house, which seems to have the virtue of lasting forever with little degradation. We do our best to re-use those yogurt containers, bought mostly in quart-size, handy for storing soup or taking it on the road. And I carry a quart-sized water bottle with me, which I refill from taps and water fountains everywhere.

Painting shows bag of flour and steel bowl covered with striped dish towel.

Bread Rising. 6″ x 6″ Gouache and watercolor pencil. Sharyn Dimmick.

I reserve the worst of my spleen for single-use plastic: since I am not going to wash and re-use plastic wrap it is better not to use it in the first place if I can possibly avoid it. I can store food in cooking pots. I can cover a bowl with a plate or a clean cloth. Some foods, for example, cucumbers and mushrooms, keep better if they are not stored in plastic.

How many of you work to minimize the use of plastic in your kitchens? Please raise your hands and share your tips with me and with Beth. The world will thank you for it, although not the plastic-producing corporations.

When I got home Sunday afternoon from a weekend getaway with a bunch of singers and musicians I found my mother putting polyurethane on the kitchen cabinets. Oh dear. I do not like to be around chemicals of any description, particularly in food environments (What my mother does is up to her, and pretty much always has been). I knew she planned to work on the cabinets while I was away: what I didn’t know was what we could possibly eat for dinner since I wasn’t going to spend any time I didn’t have to in the kitchen.

Fortunately, Mom reminded me, she had put some chicken in a marinade on Friday morning. We could have that with baked potatoes and a quick spinach salad. I nuked a couple of red potatoes in the microwave for four minutes and then set them and a pan of chicken in a 325 degree oven. Forty-five minutes later dinner was ready and I was only in the kitchen for about ten minutes.

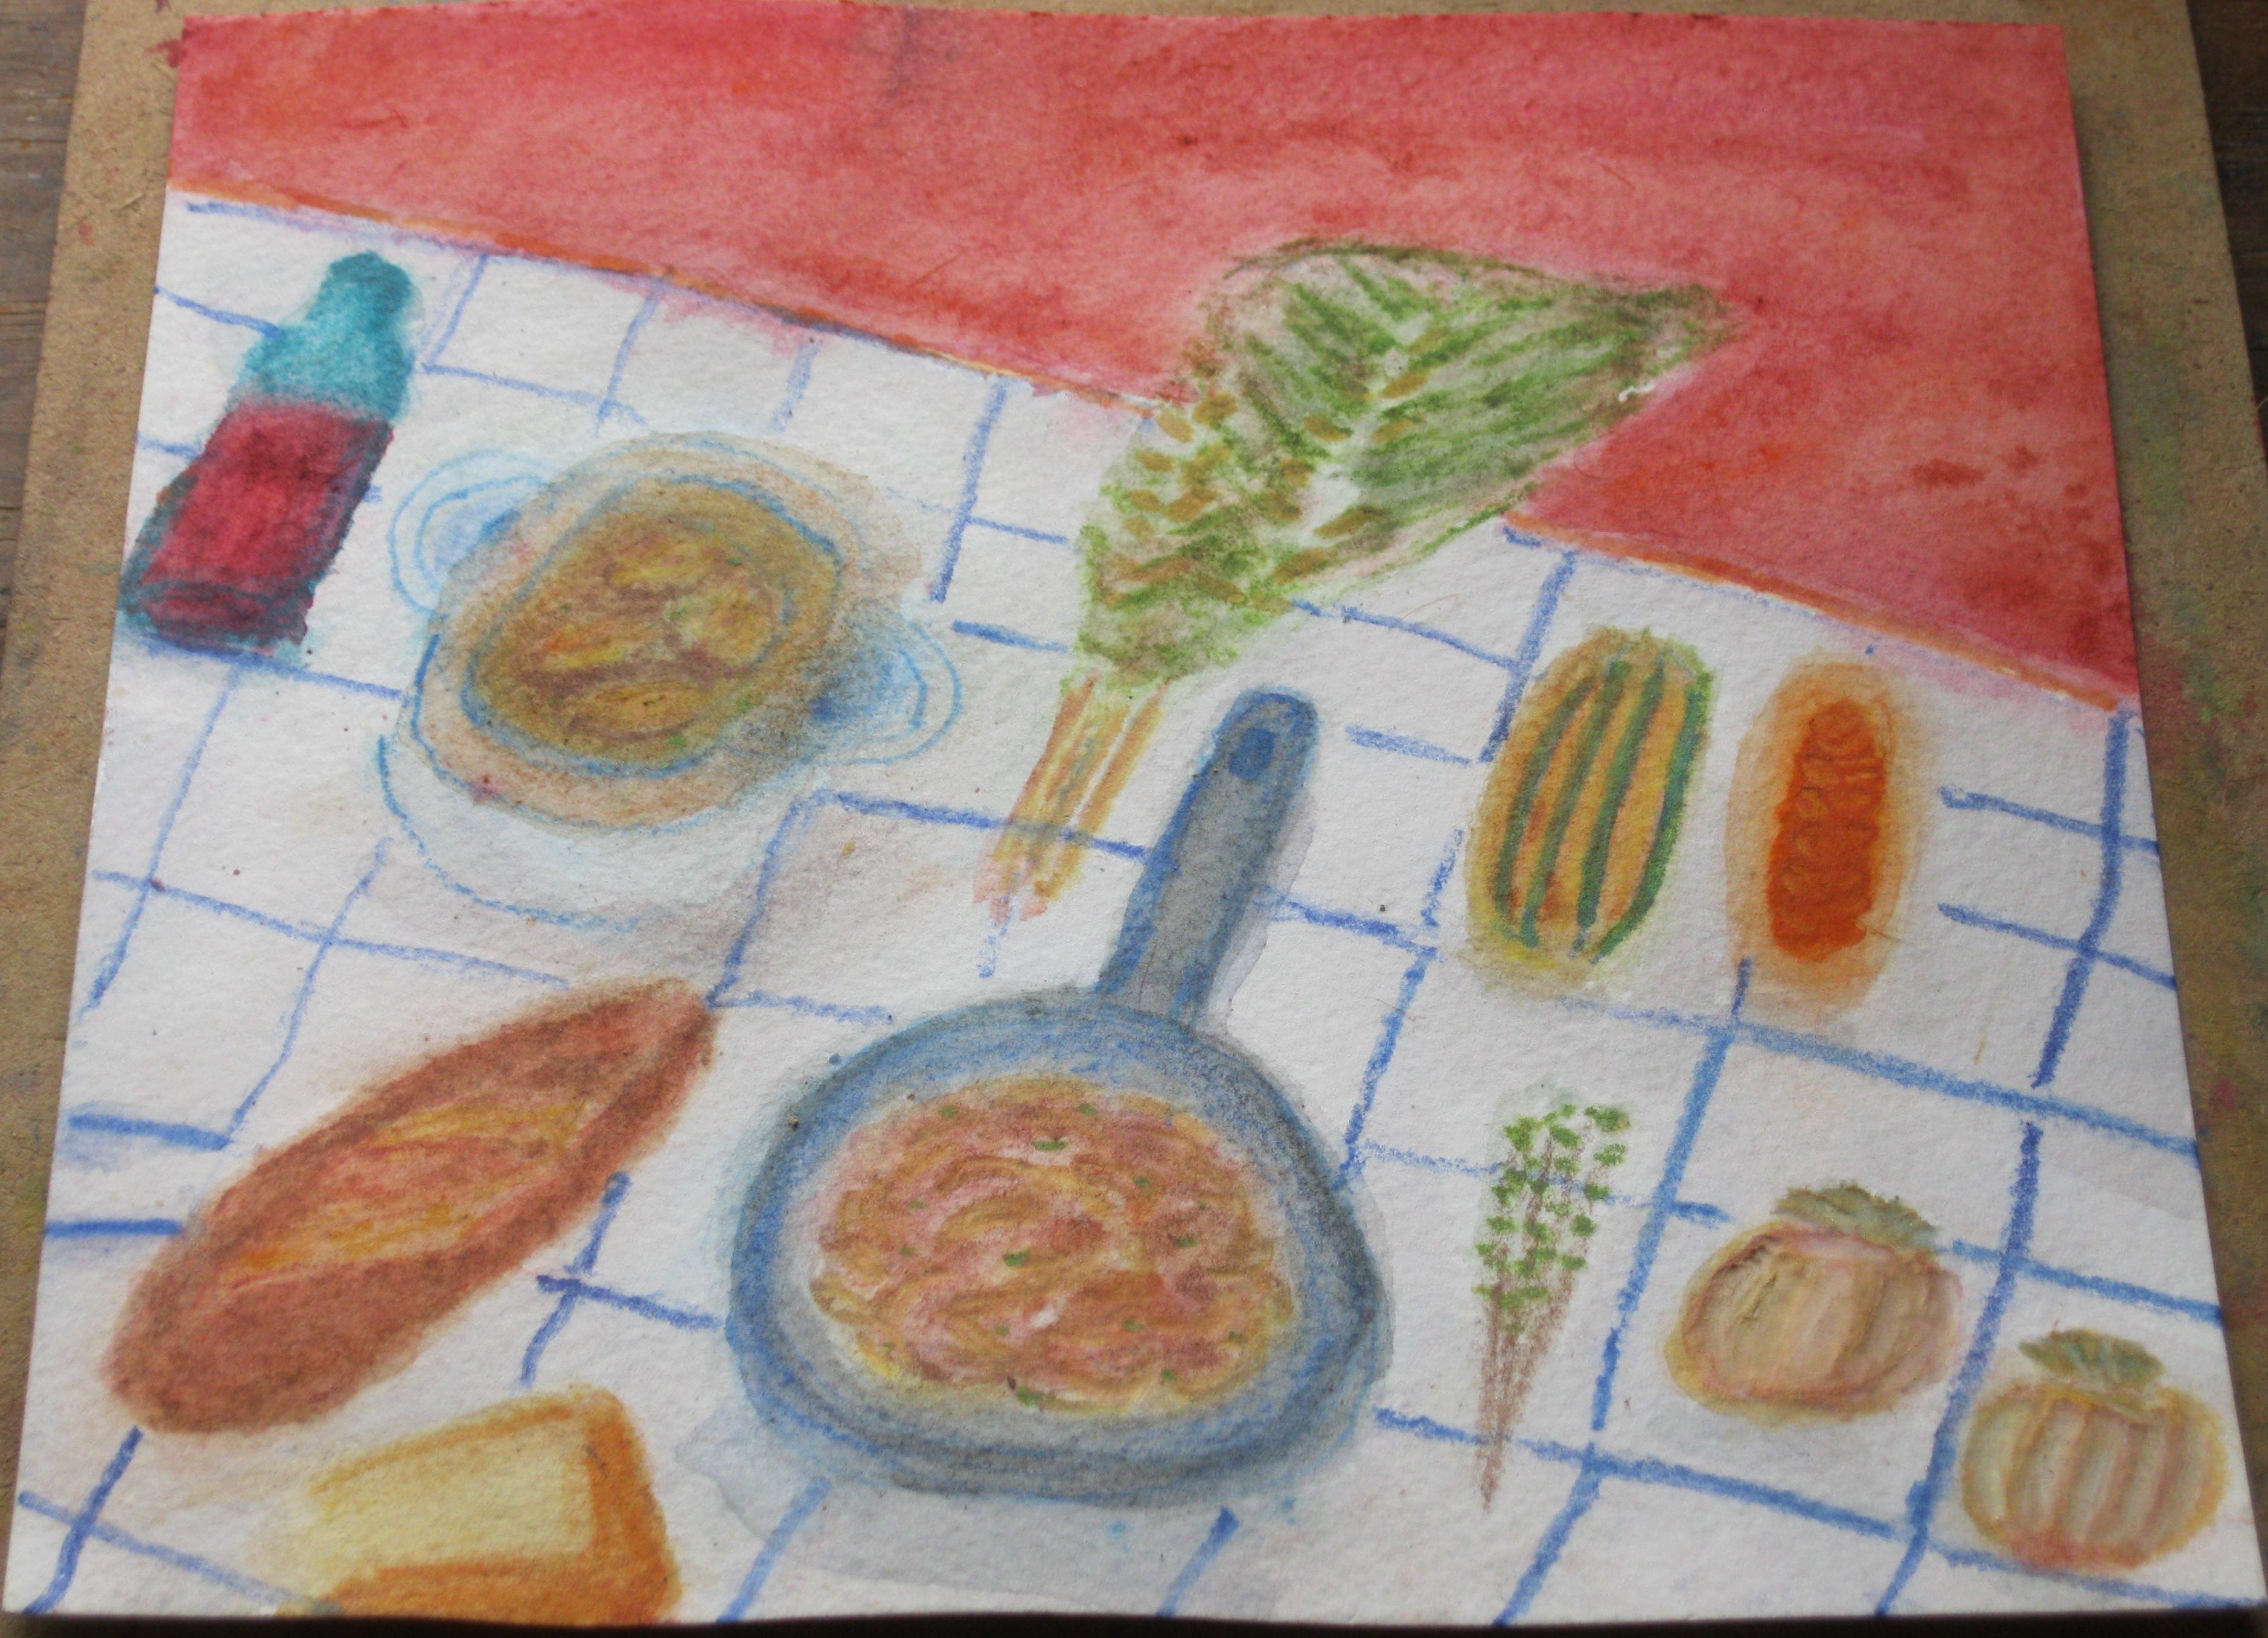
Painting of main ingredients for chicken marinade.

Fleeing Chicken. 8″ x 8″ gouache and watercolor pencil. Sharyn Dimmick

Mom has made this marinade since I was a child. It has just five ingredients: soy sauce, fresh garlic, fresh ginger, canned crushed pineapple and a little vegetable oil. Because it uses canned, bottled, dried and frozen ingredients you can make this any time of the year. Warning: Even if you live in the tropics, please do not attempt to make this marinade with fresh pineapple. Why? Because the enzymes in fresh pineapple will eat into the meat protein — if you leave it in a few hours the meat will look shrunken and chewed. If you leave it in overnight your chicken will turn into an unsightly mush. How do I know this? Because I used fresh pineapple once and only once in this recipe.

Nowadays we use skinless chicken — either it comes that way from the store or we skin it ourselves — but in my youth we used to leave the skin on. You can prepare it either way. This time we used boneless, skinless chicken breasts. but we have made it with thighs, drumsticks, bone-in half breasts. We like to leave the chicken in the marinade for three days so that the meat absorbs plenty of moisture and flavor. You can cook it after a day or two if you want.

If you can get fresh chicken, it will taste better and have a softer texture than chicken that has been frozen, but frozen chicken will work fine as long as it has a chance to thaw and absorb marinade.

When we make this, we open a 20-ounce can of crushed pineapple. We use half of it (10 ounces) for the marinade and freeze the other half to use in a future batch. Mom says it’s important to taste the pineapple for sweetness — if it isn’t sweet, she recommends adding a little brown sugar. Place the pineapple in a stainless steel, glass or ceramic bowl. Add 1/4 cup soy sauce  (I like tamari; Madge uses regular soy). You can use lite or low-sodium soy if you need to. Add crushed or minced fresh garlic — we used six small cloves in the last batch — but you can pretty much add garlic to taste. Ditto with ginger: we keep ginger root in the freezer and either grate it with a microplane or slice it into coins — we probably used about 1 Tbsp. Add 2-3 Tbsp neutral-tasting vegetable oil — I like peanut oil with Asian flavors. Mom uses corn oil. You can skimp on oil if you want to — the oil helps skinless cuts brown and keeps the chicken from sticking to the pan when you cook it. Add the chicken pieces to the marinade. Cover the bowl and refrigerate the chicken for at least eight hours and up to three days. If you think of it, turn the chicken a few times. Cook chicken in a preheated 325 oven for forty-five minutes or until done. We cook ours on foil on a broiler pan.

One batch of marinade is enough for about two pounds of chicken. If you need to double it, use the whole can of pineapple and double each of the other ingredients. You can also use this to marinate tofu. I would recommend pressing the liquid out of the tofu first before putting it in the marinade.

Once you have cooked this flavorful chicken (or tofu) it is delicious hot or cold. It can be sliced into salads or used in sandwiches. You could even use it in a cold noodle salad with peanut dressing.

Versatile Blogger Award: I would like to mention that three bloggers have kindly nominated The Kale Chronicles for the Versatile Blog Award. To learn more about the award and the women who have awarded it to me, please go visit them at eatinglocalinthelou.blogspot.com/ , gobakeyourself.wordpress.com/2012/03/23/a-monstrous-post/and susartandfood.wordpress.com/2012/03/31/versatile-blogger-award/. Elizabeth at Eating Local in the Lou shares my passion for eating local, seasonal foods and Susie tells wonderful stories before she presents each recipe.It is always a thrill to receive a blogging award and I thank these ladies kindly for reading The Kale Chronicles and for thinking of me. Because I previously received this award, here is a link to the award post where you may read seven things about me.

Painting depicts food items procured in weekly grocery shopping

The Groceries. 12″ x 12″ gouache. Sharyn Dimmick.

Last week I checked Riverdog Farm’s weekly online newsletter to see what vegetables we were going to get: tangerines, navel oranges, spring onions, cauliflower, carrots, dandelions. Dandelions! Oh, they didn’t! I read on to see that what they were really giving us was young leaves of chicory. The only thing I know about chicory is that you can make coffee substitute from it or add it to coffee for that New Orleans flavor. I Googled it. The coffee substitute is made from chicory roots. Shucks.

My mind goes back to salads we ate in Italy where they dug every bitter shoot out of the ground and dressed it in olive oil. But before I start whining in earnest I realize that a limited palette of ingredients is a test of cooking skill and creativity and that with a cabinet full of spices and a refrigerator containing milk, butter and cheeses I have more to work with than many people have had. What needs adjusting beyond the seasonings is my attitude.

This week I sufficiently adjusted my attitude to cook the chicory. I tasted it raw the day I got it: bitter. Before I cooked it I checked to see what will be in Wednesday’s box. The contents are not much different. For twenty dollars a week I am getting three pounds of fruit (oranges and tangerines) and six pounds of vegetables, including leeks, arugula, spinach, cauliflower, carrots and potatoes. That is the basic early spring produce palette here in Northern California.

This morning I went with my mother on her weekly shopping foray. This week we went to Food Maxx for canned cat food for our three cats and coffee beans for Mom. While we were there, we picked up two boxes of rolled oats, a bag of raisin bran, four boxes of whole wheat rotini, a jar of molasses, a box of Mexican chocolate, a small jar of Prego and a number ten can of hominy for posole. The food for humans in that came to $26.28 and we got a dime back for bringing our own canvas bags. Total: $26.18

We went on to Canned Foods Grocery Outlet, variously known to our friends as “Half Foods” and “Groc. Out” (before you turn up your nose, let me remind you that it was there I first found a bottle of Mosaic blood orange olive oil). There we picked up our dairy products for the week: half and half, buttermilk, sour cream and cheeses: jalapeno cheddar, a two-pound block of mozzarella for pizza-making, and a jar of marinated feta. We added in meat protein with a package of turkey sausage and one of Canadian bacon. Mom scored a 2 lb. bag of organic frozen green beans for $3.00 and a big bag of  fresh red potatoes for $2.00. I treated myself to a three-pound bag of Bosc pears from Washington State for $1.50 because the annual citrus glut is getting to me again — I will use the pears in desserts and soups and eat them as snacks. We bought a couple of cans of diced tomatoes for our winter-spring pantry, some flaked coconut and maple syrup for baking, a large package of English muffins and two different brands of commercial ginger snaps. Total for Canned Foods food: 44.83.

Adding up the food we purchased this week from all sources, I get $91.01. We will not shop again until next week and with all of this in the house we may not buy much next week beyond bread, milk and more cat food.

Now, we never start from a house empty of food. We keep a running pantry of baking supplies from butter and eggs to flour and cornmeal. We usually have walnuts and almonds and some dried fruit: right now we have dried peaches and apricots, sour cherries, raisins and home-dried apples and pears. When I get around to it, we will have home-candied citrus peels as well. We also stock rice, both brown and white, polenta and pasta. We make our own chicken stock, which we store in the freezer, and keep condiments such as mustard and red wine vinegar, soy sauce and sesame oil. We try to replace all of these items during sales to keep our costs down.

The chicory? I cooked it for dinner, after trimming all of the stems. I pulled out all of the stops. First I boiled it for fifteen minutes. Then I poured off the water, hoping to have leached out some of the bitterness. I tasted it again: still bitter and not quite dull in color. I put in a little more water and cooked it for ten more minutes. Then I pulled out a skillet, heated some olive oil and sliced up half a sausage into half-coins. I browned those while I microwaved about a quarter cup of raisins in some water (This green is seriously bitter and needed the help from the dried grapes). I added the drained chicory and some pressed garlic, then the raisins and soaking water. Even with the raisins, oil, garlic, sausage and blanching the chicory remained bitter — not slightly bitter, but majorly bitter. It is the kind of thing that gives vegetables a bad name. We ate it alongside some bland Kabocha squash gnocchi in (not bland) gorgonzola sauce. My first attempt at winter squash gnocchi lacked lightness as I had to work in extra flour to handle the dough: if I revisit gnocchi more successfully I will post the recipe later. We were grateful to have the Mexican chocolate as an after dinner treat: I prepared that with a square of bittersweet chocolate, an extra tablespoon of cocoa powder and a dash of vanilla extract in each cup, perfect for the rainy March night.

P.S. Mom, trooper that she is, reheated and ate the remaining chicory for breakfast. She said it was better after sitting overnight. I said I would never complain about kale again, knowing we could get chicory instead. We both shuddered.

painting depicts shrimp diablo and ingredients

Shrimp Diablo. 12″ x 12″ gouache and watercolor pigment. Sharyn Dimmick

I have a big binder of recipes that I have clipped from newspapers over many years. When I say, “big binder,” I mean I can’t lift it without both hands and I have been thinking about dividing it into two lately. My binder is loosely organized by main ingredient or type of food: for instance, there is an “Apple” section, but also a “Biscuits” section, “Pork,” but also “Pasta.”

Friday my Mom informed me that she had purchased some Gulf jumbo shrimp for Monday’s lunch. We don’t eat shrimp often because we don’t want to eat shrimp farmed in Thailand. Then she told me she wanted a recipe with a sauce and, of course, it needed to include ingredients we had on hand.

We had no open white wine, which lets out many recipes right there. We do have two bottles of open red, but I did not want to make that substitution in case Merlot was too strong for the shrimp. I took the “Shrimp” section out of the binder and handed her the recipes. “See what you think.”

After some discussion we settled upon Shrimp Diablo. The day she had bought shrimp I had bought a couple of grapefruit. Shrimp Diablo calls for tomatoes and grapefruit juice, dried and fresh chiles. I could use diced canned tomatoes as fresh tomato season is long past and I have always been curious about the effect of grapefruit juice in this dish.

Today I set to work. The first task was to find the New Mexican chiles. I found some expired New Mexican chili powder first and swept it into the garbage — the powder had disintegrated the cellophane packet and another plastic bag (I guess it was powerful in its day — either that or the packaging had been weakened by the New Mexico sun). I found another batch in a glass-stoppered jar (smarter) that had its full strength. Then, hiding on top of the refrigerator among the jars of tea and rice I found the dried chiles.

I put the chiles in a Pyrex bowl with water and nuked them for a minute, covered them with a plate and let them sit while I found the diced tomatoes, opened the can, peeled and sliced garlic, dug the small container of pickled jalapenos from the fridge. Mom said she was going to the store for sourdough bread. I asked her to please get some fresh cilantro.

Meanwhile I sliced five small scallions, measured out a cup of diced tomatoes, zested and juiced one grapefruit, drained the chiles. Then I put on a pot of water for pasta. Uncharacteristically I read the directions, which said to cook the pasta for twelve minutes. At the ten minute mark, Mom had not returned from the store, so I drained the pasta, reasoning that it could finish cooking in the sauce.

Then I peeled shrimp, reserving the shells in a small plastic container to freeze for future stock.

Eventually, Mom returned, bearing cilantro and bread. While I cooked the shrimp, she chopped cilantro and sliced bread and heated bowls. The resulting pasta was piquant, pleasantly hot, with a distinct grapefruit aftertaste. The sauce reminded me of cioppino and was great for soaking up with bread.

Shrimp Diablo (modified from a camping food recipe, originally published in the Contra Costa Times)

For four servings you will need a pound of jumbo shrimp and half a pound of whole wheat pasta. If you will not be satisfied with that quantity, go ahead and adjust the recipe for more pasta or more shrimp

Nuke 1 large dried red New Mexican chile in a glass bowl with a little water for one minute. Cover said chile with plate while you continue with the recipe.

Measure 1 cup diced tomatoes into your blender or food processor (or use 1 large tomato during tomato season).

Peek 5 cloves of garlic and slice or chop roughly. Add to tomatoes in blender

Mince 2 jalapenos or toss in 1 Tbsp of pickled jalapeno rings

Zest 1 grapefruit. Add zest to blender

Now juice the grapefruit (which should yield 1/2 cup juice) and set juice aside for now.

Slice 5 scallions into small pieces. Set aside

Peel 1 lb jumbo shrimp. De-vein if necessary.

Chop 1/3 cup cilantro and add it to blender

By now, your dried chile should be pliable. Tear it into small pieces and add to blender. Whir contents of blender to get a thick, chunky paste.

Put pasta water on to boil for 1/2 lb whole wheat penne

Now assemble next to your stove your tomato-pepper-garlic paste, your reserved juice, your reserved scallions, your peeled shrimp, some olive oil.

Get your pasta cooking before you make the shrimp and sauce, which only takes about five or six minutes.

Heat some olive oil in a good-sized skillet. When oil shimmers, cook the onion. Then add the shrimp and cook until just opaque.

Add the contents of blender and the reserved grapefruit juice. Cook until it simmers and add your drained pasta just until heated through.

Serve in bowls with some good sourdough bread for cleaning up the sauce.

Food Notes: If you don’t like spicy food, cut down on the chiles. If you don’t like chiles at all, skip this recipe. If you don’t like cilantro or are allergic to it, choose some benign herb of your liking. I can imagine tarragon or summer basil. Please make this with fresh grapefruit, which has an incomparable flavor that you just don’t get in a can or frozen. And, yes, you can make it with “regular” pasta, but I don’t know why you would, unless you are out of whole wheat.

By the way, my sister-in-law was here for lunch, just so you know that Mom and I did not eat two bowls apiece. We each had a bowl and there is a small bowl left with two lonely shrimp.

How ’bout that: fresh grapefruit juice and zest makes this fit for a little citruslove, the wonderful January blog hop. #citruslove. Go check out some more citrus recipes here.

Painting note: I did this painting with pigments and brushes only. No watercolor pencils for a change.

Painting of turkey, noodles and ingredients.

Turkey and Noodles. 12″ x 12″ gouache and watercolor pencil. Sharyn Dimmick.

My Grandma Carroll, who contributed the rolls to so many of our holiday dinners, was famous for her chicken and noodles — it was probably the best dish she made and the one everybody wanted the recipe for — but she didn’t want anyone to best her at her star food. When my mother asked her how she made them, she said, “Oh, you just take an egg and a cup of flour.” She neglected to mention the other two eggs or extra egg yolks she always added. So Mom went home and made them and they were impossibly dry.

The next time we went over to Grandma’s house, my Mom said, “Mother, do you only put one egg in your noodles?”

Grandma turned her head to the side and started giggling.

“Well, if you have another egg…,” she said.

My mother finally figured out that the correct ratio was three eggs to one cup of flour, or an egg and as many extra egg yolks as you had from some other cooking project.

You add the flour (seasoned with 1/4 tsp of salt and 1/2 tsp of paprika) to your eggs or egg and yolks and knead it for awhile until it is spongy. Then you roll it out as thinly as possible on a floured cloth.

Now you have a choice. You can cut your noodles and have them “soft,” or you can let the rolled out sheet of dough dry out for a day, depending on how much advance planning you have done. Our family prefers noodles that have dried for a day — that’s what Grandma made.

I watched Mom make these yesterday. She cut the dough in half before she rolled it out, so, one cup of flour and three eggs make two sheets of noodles. Then she set them on a tea towel to dry with a sheet of paper over them. Several hours later she replaced the paper with another tea towel. Grandma used to hang sheets of noodles over the top of her swinging door and I have seen Mom hang them in ingenious ways in the past, but she doesn’t do that anymore — now she dries them flat (If you hang your noodles they may dry better because they’ll get better air circulation). This time we let them dry overnight.

Whenever you cut them, roll each sheet of dough up like a jelly roll and cut them in thin strips: remember that noodles expand in the broth that you cook them in, so cut them thin.

Grandma most often made chicken and noodles cooked in chicken stock: she would cook a chicken in water, bones and all, remove the chicken, take some of the meat off the bones, boil down the cooking stock and cook her noodles in it. But if she had turkey leftovers, she would boil up the turkey carcass, neck and giblets for stock, reserving some turkey meat, and cook her noodles in that. When we make stock, we add in ends of carrots and celery for extra flavor. We strain the stock and remove some of the fat.

Mom says it is important to leave some fat in the stock so that you will not have a flat flavor. I say you have to have some salt in the stock to avoid the same flat flavor — if the noodles taste flat I either add salt at the table, or eat them with Tabasco sauce. Mom says that Grandma also added some butter to her stock before adding the noodles. For best results, heat the strained stock to a full rolling boil, drop noodles into it a few at a time and cook the noodles in the turkey (or chicken) stock until they are soft (from fifteen minutes to half an hour. At this point, season with salt and pepper to taste, add 1 Tbsp of butter and then add your reserved meat until it is just heated through in the noodles.

These noodles improve over the next few days: you might consider them to be second generation leftovers.

The Kale Chronicles’ Food Manifesto: Ideas I Try to Live By

painting of foods for four seasons

Seasonal Food 6″ x 6″ gouache and watercolor pencil. Sharyn Dimmick

1)   Eat fresh, locally-grown food in season.

Fresh food tastes good. It has more vitamins and minerals in it than preserved food. If you can grow your own food, go for it. If you can’t, seek out farmers’ markets or a community-supported agricultural program. Familiarize yourself with what grows in your area when.

2)   Adapt recipes to use local resources.

For instance, pesto recipes often call for pine nuts. Here in the Bay Area of Northern California, pine nuts are currently selling for thirty or forty dollars a pound. I make my pesto with walnuts, which grow in California and can be found at my local farmers’ market in bulk. If you live in an area that produces almonds, hazelnuts, black walnuts, macadamia nuts, Brazil nuts, substitute them for pine nuts. Eat pine nuts when you go to Italy or visit New Mexico.

3)   Use what you have on hand.

Instead of running out to get ingredients, practice cooking with what you have on hand. Develop a regular routine for food shopping and stick to it. You will save time and money if you are not always running to the store and you will develop your creative cooking muscles. Mom shops for groceries once a week at a variety of places (Safeway, Grocery Outlet, Food Maxx or Country Cheese). I pick up a box of vegetables in Berkeley on Wednesday afternoons and often go to the Saturday Farmers’ Market.

4)   Do not waste food.

We spend money for food and then we throw it away when it is less than perfect or past the pull date. Many people frequently throw away food that can be eaten. A routine throw-away is sour milk (or half and half, or cream), or, worse, milk that has just passed its pull date. Sour milk, cream, etc. can be substituted for buttermilk in recipes that involve cooking or baking. Sour milk can also be “sweetened” with baking soda and then used in cooked or baked recipes meant for fresh milk.

painting shows dehydrated and canned food for winter

Food for Winter 6″ x 6″ gouache and watercolor pencil. Sharyn Dimmick

5)   Find simple ways to preserve foods for winter.

I bought a dehydrator a year and a half ago. Now I make my own dried tomatoes which I use during the winter in soups, pastas and salads. I have also dried apples and pears and I’m just getting started. With trepidation I learned how to put up dilly beans, a baby step into home canning. When I make pestos or curry pastes, I put part of the yield in the freezer for later.

6)   Develop a personal pantry based on what you like to eat and ingredients you use frequently.

For example, I am a baker as well as a cook, so I stock a baking pantry with flours, sugars, molasses, honey, maple syrup, vegetable shortening, oils, nuts, coconut, dried fruit, yeast, and leavening agents. I cook Chinese food so I keep soy sauce, peanut oil and chili paste with garlic, fresh ginger. I cook Thai food so I keep fish sauce. A pantry rich in canned tuna and white beans would do me no good because I am not going to cook with those ingredients, or canola oil, which tastes like fish to me, but I do keep lots of pasta, polenta, rolled oats, dried tomatoes, kalamata olives.

7)   Stock your pantry when you find good deals on things you use often.

We are infamous for buying canned sour pie cherries by the case. We like cherry pie. Sour cherries make the best pies. Canned cherries keep. So when Grocery Outlet features canned cherries we buy a case at a time. We keep them in the garage. We have learned the hard way that inexpensive pie cherries are hard to find, so when we see them we buy them. We also stock up on sugar, flour, butter, pastas, and miscellaneous canned goods when they are on sale.

painting shows stock pot, skillet and ingredients.

Making Stock 6″ x 6″ gouache and watercolor pencil . Sharyn Dimmick.

8)   Learn to make stocks.

You don’t have to go to cooking school for this. You don’t have to roast bones (although roasted bone stock is supposed to be good). The Greens Cookbook has wonderful recipes for vegetable stocks, which I recommend. But any old person can plunk a chicken or turkey carcass into a pot of water with some vegetables or vegetable trimmings (the ends of carrots, tough ends of celery, celery leaves, cilantro roots and stems, the skin of roasted winter squash), simmer it, strain it, skim of the fat and, voila, a base for soups, sauces, chicken pot pie, Chinese stir fries. For me, chicken stock is indispensable. We keep it in pint containers in the freezer.

9   Develop your cooking resources.

I learned to cook by cooking with my mother and asking questions about what she did, but I also learned by tasting lots of foods, watching cooking shows on PBS, reading cookbooks and having conversations with others about food, especially people whose cooking I liked. We keep an old Betty Crocker picture cookbook as our cooking Bible. I have bought the cookbooks of several of my favorite restaurants: Ajanta, Henry Chung’s Hunan, Greens, and Chez Panisse (I really like the Chez Panisse Desserts cookbook, which taught me how to make fruit caramel and variations on fruit curds and has a good section on seasonal fruit in California). I keep a large binder of recipes from the food sections of two newspapers, organized by main ingredient or type of food: Carrots, Chocolate, Cookies, Corn, Fennel, Fish, Lemons, Pancakes, Pasta, Peppers, Pumpkin, Soup, etc. I browse through it when I’m trying to remember what I cook with savoy cabbage or looking for that fabulous Polenta Pancakes recipe from Mark Bittman. I also search online when I need more ideas and subscribe to more than a couple of food blogs.

10) Don’t be afraid.

Remember, cooking is fun. It is a sensual experience standing in front of a cutting board with the smell of fresh basil wafting through the air, hearing the snap of green beans as you trim them, seeing the colors of eggplant, peppers and peaches sitting on the counter. If you are not sure how to do something, you can always consult a cookbook, watch a video online or call another cook on the phone. If you tackle a technique or dish you have never attempted you might want to follow instructions carefully the first time around, but once you learn some cooking principles and the rules of substitution you will be freer to cook what you have and turn it into what you like.

painting depicts onion soup and fall vegetables

Onion Soup, 8″ x8″ watercolor pencil and gouache. Sharyn Dimmick

Today we had our first real fall day: when it dawned with blue sky and white clouds there was a distinct chill in the air, a crispness. By 11:30 I was digging cashmere sweaters and long underwear out of my camphor chest. When I went down to the kitchen for lunch, I grabbed the last bowl of vegetable soup from the refrigerator.

Because I have been gone for three days I looked around the counter and into all of the covered pots in the fridge. First I found a pan of meat brownings. Then my eye fell on two large onions from last week’s farm box and a half-loaf of crusty sourdough. The butter plate with a smidge of unsalted butter clinched it: we would have French onion soup for dinner and because I would need to brown the croutons in the oven we would have another Gravenstein apple pie. I’ll roast delicata squash while I’m at it and there is some Swiss chard with our name on it. Dinner will come together in a snap.

I began by peeling and slicing the two large onions as thinly as I could, while I heated a skillet and added a little olive oil and all of the butter I could scrape off the butter plate. After I put them in the pan I cleaned the cutting board, composted the onion scraps and took four large apples from fridge, checking to make sure we still had pie crust. By this time, Mom was back from errands and made tea so I turned off the browning onions and retreated upstairs for a cup of tea. By then it was raining, making me glad to be inside cooking and puttering.

Tea finished, I peeled apples for the pie and cut the squash open. I started scooping seeds into the compost and then realized I could start a vegetable stock with apple peels and squash innards, not to mention the tough ends of Swiss chard, so I covered the seeds and strings from the second squash with some water in a saucepan and set it to simmer with the apple peelings and trimmings.

Classic onion soup uses Gruyere. Gruyere is rare in our house, as is any kind of French or Swiss cheese. What we have is Parmesan, since throwing the lemon Stilton in the tomato tart last week, so I will shave Parmesan onto croutons to top the soup. Browned Parmesan is delicious (sometimes I eat it on buttered whole wheat toast) so I don’t see this as a problem.

French Onion Soup

Put on a skillet to heat over medium heat.

While skillet heats, peel and slice thinly:

2 large onions

Add about 1 Tbsp olive oil to skillet, plus a little butter — maybe 1 tsp

Brown onions slowly over medium heat — if you don’t stir them much they will brown faster.

While onions brown, slice

4 slices of crusty bread and

Slice cheese to taste (I used an ounce or two of Parmesan, but you can use anything you like)

Add 1 tsp thyme to onions

Season with black pepper and salt to taste.

Put browned onions in oven-proof casserole with a broad opening.

De-glaze onion pan with 2 Tbsp of wine and add to onions in casserole.

Add 1 pint chicken stock. If you have brownings from another project, add them too.

Preheat oven to 375 degrees.

Place slices of bread on top of onions and broth. Add cheese. Bake until cheese browns.

Serves four, or two very hungry people.

If you want to emulate my style of cooking, consider what else you can bake in a 375-degree oven. In my case, it was apple pie and two delicata squash, which I baked cut side down in a Pyrex pan. When they were done, I flipped them cavity side up, added a dot of butter, a tsp of homemade syrup (brown sugar, honey, water and the dregs from a bottle of maple syrup) and black pepper and let them bake for five more minutes. You could also add ginger jam or chutney to season the squash instead of syrup, or just use brown sugar and butter.

While everything baked, I cleaned and chopped a bunch of Swiss chard, separating the stems from the leaves. Using the onion skillet, I heated about 1 tsp of olive oil and cooked the stems first for a minute or two, then added the shredded leaves, covered and steamed for five minutes in the water that was clinging to the leaves.

After we ate the squash I added the roasted skins to the stock pot — I’ll boil it again tomorrow. Eventually, I’ll reduce it, strain it and freeze it and have it on hand for the first batch of butternut squash soup later in the fall.

Painting Note: For information on “Onion Soup” or any watercolor painting, please go here.

When I saw the list of vegetables from Riverdog Farm today I knew what I would be cooking soon: it is what I cook when zucchini first swings into season, along with corn and the first tomatoes — pancakes made of grated zucchini and fresh corn, bound with egg and a little flour, seasoned with fresh herbs, fried in butter and olive oil and topped with halved cherry tomatoes and a spoonful of sour cream. Can you say summer? Even late summer, as it turns out., or early fall. The seasons are wacko in California this year, with long spring rains and chilly weather, so all of our crops are later than usual.

Painting of Zucchini-Feta Pancakes and ingredients.

Zucchini-Feta Pancakes with Fresh Corn. 8″ x 8″ gouache and watercolor pencil. Sharyn Dimmick.

I first saw a recipe like this in Mollie Katzen’s Moosewood cookbook. As a non-lover of zucchini, I immediately saw the camouflage possibilities (My other go-to zucchini recipe is gingerbread muffins with grated zucchini). The first time I made it, I made it by the book. The next time I added fresh corn kernels and began topping it with tomatoes and sour cream, I love feta cheese — it is one of the cheeses I prefer to keep on hand, along with Parmesan, extra sharp cheddar and Gorgonzola — if I could only have four cheeses, those would be the four.

Why don’t I like zucchini? Does anybody care? I find the skin is often bitter and the flesh either bitter or insipid. I’m always disappointed when some Chinese restaurant fills their kung pau chicken with zucchini. I grew up eating zucchini baked in tomato sauce and topped with cheese and didn’t like that much either, but I am happy to make these pancakes whenever zucchini appears in the veggie box.

Here goes:

Zucchini-Feta Pancakes with Fresh Corn and Cherry Tomatoes

Grate 4 cups of zucchini. Salt it lightly and leave to drain in a colander for fifteen minutes.

While zucchini drains, separate 4 eggs, yolks into large bowl, whites into a small one.

Beat the egg whites until opaque and fluffy.

Add to egg yolks:

1 cup crumbled feta cheese (You can buy a block and crumble it with a fork or your fingers)

1/3 cup whole wheat pastry flour

chopped fresh herbs to taste — I like mint and dill. Basil is also good, or chives if you like an onion-y presence.

drained zucchini

kernels cut from 2 or 3 ears of fresh corn.

Fold in reserved egg whites.

Heat a skillet over medium-low heat. Fry cakes in a mixture of butter and olive oil (I usually scoop 1/4 to 1/3 cup of batter out with a measuring cup for each pancake).

Serve with halved fresh cherry tomatoes and a spoonful of sour cream or yogurt, or top with applesauce for a latke nouveau.

Notes: I often make just half a recipe, using two eggs and two cups of zucchini. And you don’t have to have zucchini — you can make this with crookneck squash, patty pan, or whatever summer squash comes your way, including mixtures of varieties.

If you don’t like feta, improvise with some soft cheese that you do like.

I haven’t tried this with grated winter squash or sweet potatoes yet, but it’s only a matter of time: you could even use summer and winter squash together as their seasons cross if you like both of them. And, of course, you can grate other things into them, but this is the way I like them.

Painting Note: I just updated the About page to include some notes on my painting media and process. If you are curious about the paintings, take a look. For information about “Zucchini-Feta Pancakes” or any other original painting please contact me here.

Painting of Bengan Bharta and Ingredients.

Bengan Bharta. 8″ by 8″ gouache and watercolor pencil. Sharyn DImmick

When I was in my last year of college at U.C. Santa Barbara I lived in an apartment on Pardall Road with a roommate from Thailand and one from India. I had just come from a year as an exchange student in Ireland and was happy to serve as a cultural interpreter as necessary for Karuna and Padma. I also reveled in the exposure I got to Thai and Indian foods and recipes. I ate my first dosa and raita, my first green papaya salad, and got hooked on both cuisines, so, keeping a seasonal and local focus, I sometimes make forays into Thai and Indian cooking.

For me, that requires cookbooks, although I can fake Thai soups and noodle dishes by now (some of you may have seen the peanut sauce recipe recently). I own Charmaine Solomon’s “The Complete Asian Cookbook” and Shanta Sacharoff’s “Flavors of India,” but my favorite Indian cookbook comes from Berkeley’s own Ajanta restaurant: it’s called “Ajanta: Regional Feasts of India” by Lachu Moorjani. Ajanta is simply the best Indian restaurant I have ever eaten at (I have never been to India). Moorjani cooks with what’s in season, rotating regional dishes through his menu each month. If you can go once a month, go, but take other people with you so that you can sample each monthly special.

This week the CSA from Riverdog Farm contained about three pounds of tomatoes, a pound of bell peppers and two purple and white speckled eggplants. When tomatoes and eggplants come together in the fall, I like to make baingan bharta or bengan bharta, an Indian dish of chopped roasted eggplant simmered in a sauce with fresh tomatoes, ginger, onions, a green chile, paprika, turmeric, cumin seeds, coriander and cayenne. I loved this dish the first time I tasted it, right out of the Tasty Bites package, but thanks to Moorjani I now know how to make my own from scratch.

Without further ado, Moorjani’s recipe, followed by food notes from me where I explain a few minor adjustments I’ve made and give some procedural information.

Baingan Bartha (Pureed Roasted Eggplant with Onions, Tomatoes and Spices)

2 large round eggplants, about 1 pound each.

6 Tbsp oil (I used between 2 and 3  of peanut oil — more on that later)

2 tsp cumin seeds

2-inch piece of fresh ginger, peeled and finely chopped ( I mince mine and don’t bother to peel it)

1 hot green chile (serrano or jalapeno), chopped

3 medium onions, peeled and chopped

6 medium tomatoes, chopped

4 tsp paprika

1/2 to 1 tsp cayenne

2 tsp turmeric

2 tsp coriander

2 tsp salt (I cut it down to one)

1/4 cup chopped cilantro

I began by turning on the oven to 400 degrees, pricked my two eggplants with a fork and let them roast while I had a cup of tea and checked my email. When I pulled them out of the oven and set them on the stove to cool I peeled and chopped my onions and pulled my ginger out of the freezer where I store it. I hacked a slit in it and let it thaw slightly while I chopped a previously roasted green chile (just because I had it — if I hadn’t I would have used a raw one, but I have made this before). By the time I had chopped all of those onions, I could get the knife through the ginger and minced it while I heated 2-3 Tbsp of peanut oil in a big skillet over medium heat. When the oil shimmered, I measured out my cumin seeds and threw them in, quickly adding the ginger and chile, then the chopped onions. I cooked all that over medium heat for about 10 minutes while I chopped a monstrous 1 and 1/2 pound tomato, green in color, not in ripeness, and a smaller red tomato. I threw in another tomato I had roasted yesterday (waste not, want not, and this is a cooked dish). It was lovely to see the soft green, bright red and reddish violet of the vegetables before they cooked down. I cooked the tomatoes for five minutes.

While my tomatoes cooked I measured my salt and spices, scanting the salt and using the smaller amount of cayenne specified. Then I stirred the spices into the tomato mixture and turned to my now-cooled eggplant, stripping off the skin and chopping it finely.

If at any time my onions, eggplant, or tomatoes had begun to stick to the pan, I would have added a little more oil and turned down the heat a notch. This time I didn’t need to do either. Tomatoes, onions and eggplants vary in their water content, so you never know. Also, many cooks use more oil than I do, so I never accept oil measurements at face value unless they are in cake recipes and in cake recipes I might substitute  yogurt for some or all of the oil.

About this time I put on a pot of water for brown rice — I can’t tell you how much water because we measure it by sticking our index fingers into the rice pot and measuring water to the first joint. I can tell you that I have large hands and long fingers, as does my mother, who originated this technique and that we have cooked rice in the same pot since I can remember. The finger measurement is good for one cup of rice, brown or white: I used brown basmati. When the rice was in the pot I scooped the chopped eggplant into the skillet, scraping the bottom with a spatula to check for browning, It was fine, so I left it to go upstairs and ask Mom what she wanted instead of cilantro, which I was out of. I then went out to the garden and picked a combination of Thai basil and mint. I stirred the Thai basil into the eggplant and left the mint minced on the cutting board in case Mom didn’t want any. The recipe is good with cilantro, but one of the house rules here is that we do not go to the store for one ingredient: instead we make do, substitute, cook something else if necessary.

While the rice cooked and the baingan bharta finished cooking, I made a smoothie out of a nectarine, some buttermilk and a small handful of almonds. Because I was eating it with Indian food, I crushed a few cardamom seeds in a mortar and pestle and added them. Had I been at Ajanta I would have finished the meal with cardamom gelato and a pot of chai — and we would have gotten kabuli naan (flat bread with cashews) because my Mom is addicted to it. She would have ordered lamb and I would have browsed through the specials before making my decision.

If you are local, or visiting Berkeley, or, really, anywhere in the Bay Area, you should eat at Ajanta at least once. You will find it on the internet at http://www.ajantarestaurant.com. Moorjani sells his cookbook there, as well as a box of Indian spices, including some hard to find ingredients. This duo makes a fabulous present for the would-be Indian cook and the winter holidays will be here before you know it.

Painting Note: For more information about “Bengan Bharta” or any other original painting, please contact me here.

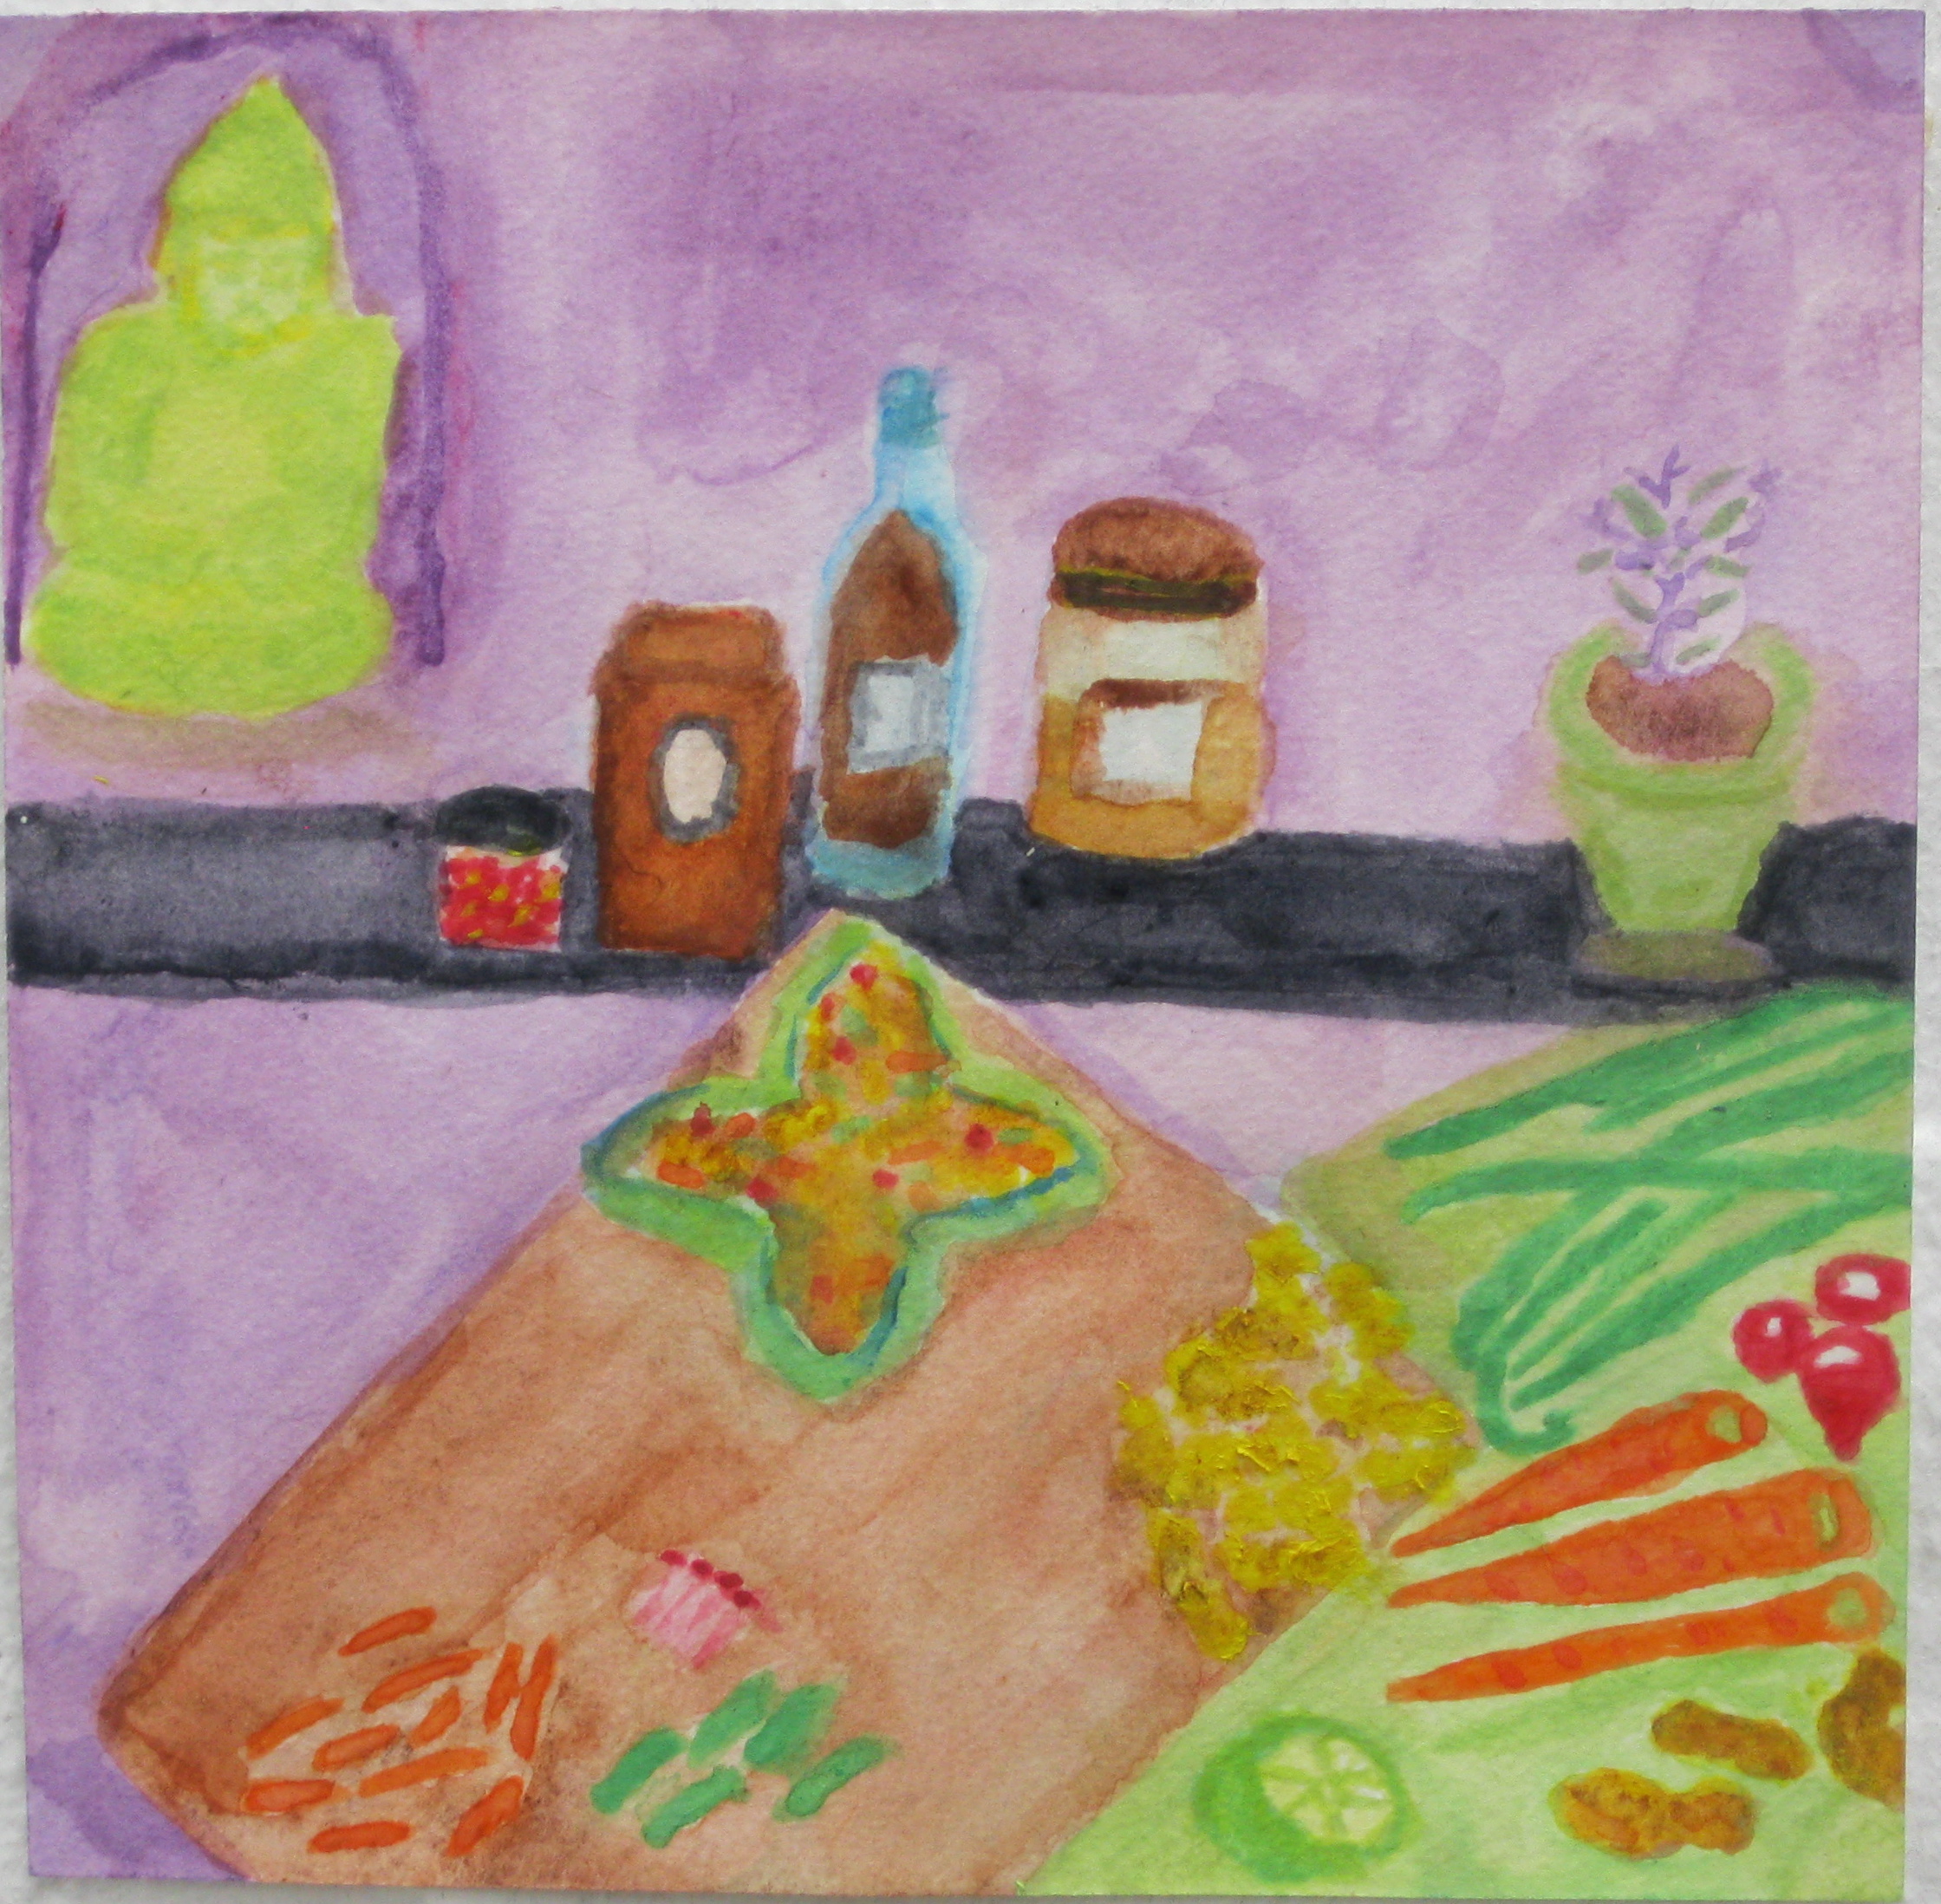
painting depicts ingredients for pasta with peanut sauce

Thai Pasta with Peanut Sauce 8″x8″ gouache on paper Sharyn Dimmick

The other day I started to think about what I had in common with kale:

1) I am not always sweet — sometimes I am quite bitter.

2) I am not to everybody’s taste: a little of me can go a long way.

3) I am rough around the edges

4) I am somewhat green.

5) I am tough.

Some people like kale in its raw state. Others like it lightly steamed or sauteed in minimalist preparations. For me to enjoy kale, it requires tender care and the presence of other ingredients that I like. Kale will never make the top of my favorite foods list, so I often resort to what I call camouflage cooking, a technique known to mothers everywhere, where you bury a vegetable in so many other flavors that it no longer calls attention to itself. You still get the nutritional value of the mean green vegetable which is very good for you: what you eliminate is what my Dad called “that nasty vitamin taste.”

Two weeks ago I met my friend Cathy at the Farmers’ Market in Berkeley and we began to discuss kale. She told me that she cooks it in a little oil with a little water and throws in walnuts and raisins at the end of the cooking. The raisins sweeten the kale, ameliorating the bitterness and the walnuts add richness and give the bitterness a different edge: it is like forgoing outright cruelty and making use of well-placed sarcasm instead.

Another way to camouflage kale is to turn up the heat: I have chopped kale leaves finely, after removing the ribs and stems, and thrown them into posole — hominy cooked with chiles or salsa, in chicken broth or pork stock, seasoned with lime. Canned Foods Grocery Outlet, Food Maxx and Mexican groceries sell posole in number ten cans: I usually open one, decant half of it into a big jar for the freezer, and throw the other half in a pot. I like to make posole with about half a jar of green salsa (maybe twelve ounces), a pint of chicken stock and the juice of one lime. If I want a sweeter flavor, I add chopped sundried tomatoes to it. The longer you cook the posole the better the kale blends with the other ingredients, melting into harmonious flavor.

The big guns of camouflage cooking with kale are peanut sauce and coconut milk. If you like peanut sauce, you know you can eat it on anything because what you will taste is peanut sauce. I make an instant peanut sauce that I eat on pasta in the following manner:

Put your pasta water on to boil. I like to use short pastas because they catch the peanut sauce (penne, fusilli, farfalle, — also known as twisties and butterflies). I usually use wheat pasta, but you can go authentic and use rice noodles if you want. Get out the bowl in which you plan to eat your pasta. Put into that bowl between two and three tablespoons of peanut butter (Please use natural peanut butter without added shortening). Squeeze one lime into the peanut butter. Add something hot — my favorite addition is Chinese chili paste with garlic, a teaspoon if you like heat, a quarter to an eighth teaspoon for just a hint. Get down your fish sauce or tamari and add a tablespoon. You now have hot, sour, peanut-y and salty. Add some brown sugar: start with a teaspoon and trade up — this will be a matter of taste and opinion about how much sugar you want to consume. We like it sweet. If you want it even sweeter, add some coconut milk from a can — a few tablespoons should be sufficient. To get it right for you, you will have to stir and taste the raw sauce. It isn’t going to hurt you — just don’t eat it all in the tasting phase or you may have to start over.

Before it is time to drain the pasta, I have usually had enough time to julienne some carrots and/or radishes, chop some broccoli or green beans or cucumber. Carrots, radishes and cucumber go directly into your bowl with the peanut sauce. Broccoli or green beans go into the pasta water for the last minute of cooking, after which you drain the pasta and vegetable and add it directly to your pasta bowl. Garnish with basil, Thai basil, cilantro, or chopped fresh mint. Toss madly.

I developed this recipe when I lived and cooked alone. It is an ideal one-person pasta. If I make it for two, I generally stir up two individual bowls of sauce. If I want to make a lot, I start with a big serving bowl rather than individual bowls, use larger amounts of sauce ingredients and might pop it in the microwave for a minute to make sure the peanut butter softens. If you like, make extra: it reheats well if you leave out the cucumber, or it can be eaten cold.

Thai Pasta with Peanut Sauce:

Boil water for one serving of pasta

While water comes to a boil, stir together in pasta bowl:

2 Tbsp peanut butter

1 Tbsp fish sauce

Juice of 1 lime

1 tsp chili paste with garlic

1 Tbsp brown sugar (or more or less to taste)

Julienne 1 carrot and/or three radishes. Chop some cucumber if you want. Add vegetables to bowl of sauce. By now, your pasta water should be ready. Start cooking pasta.

Cut up some broccoli or green beans. Add to pasta water in last minute of cooking.

Drain pasta and vegetables and add to sauce in bowl. Garnish with basil, Thai basil, cilantro or fresh mint. Stir it thoroughly with your fork. Enjoy.

Painting Note: For information about “Thai Pasta with Peanut Sauce” or any other original painting, please contact me here.