Archives for category: fruit
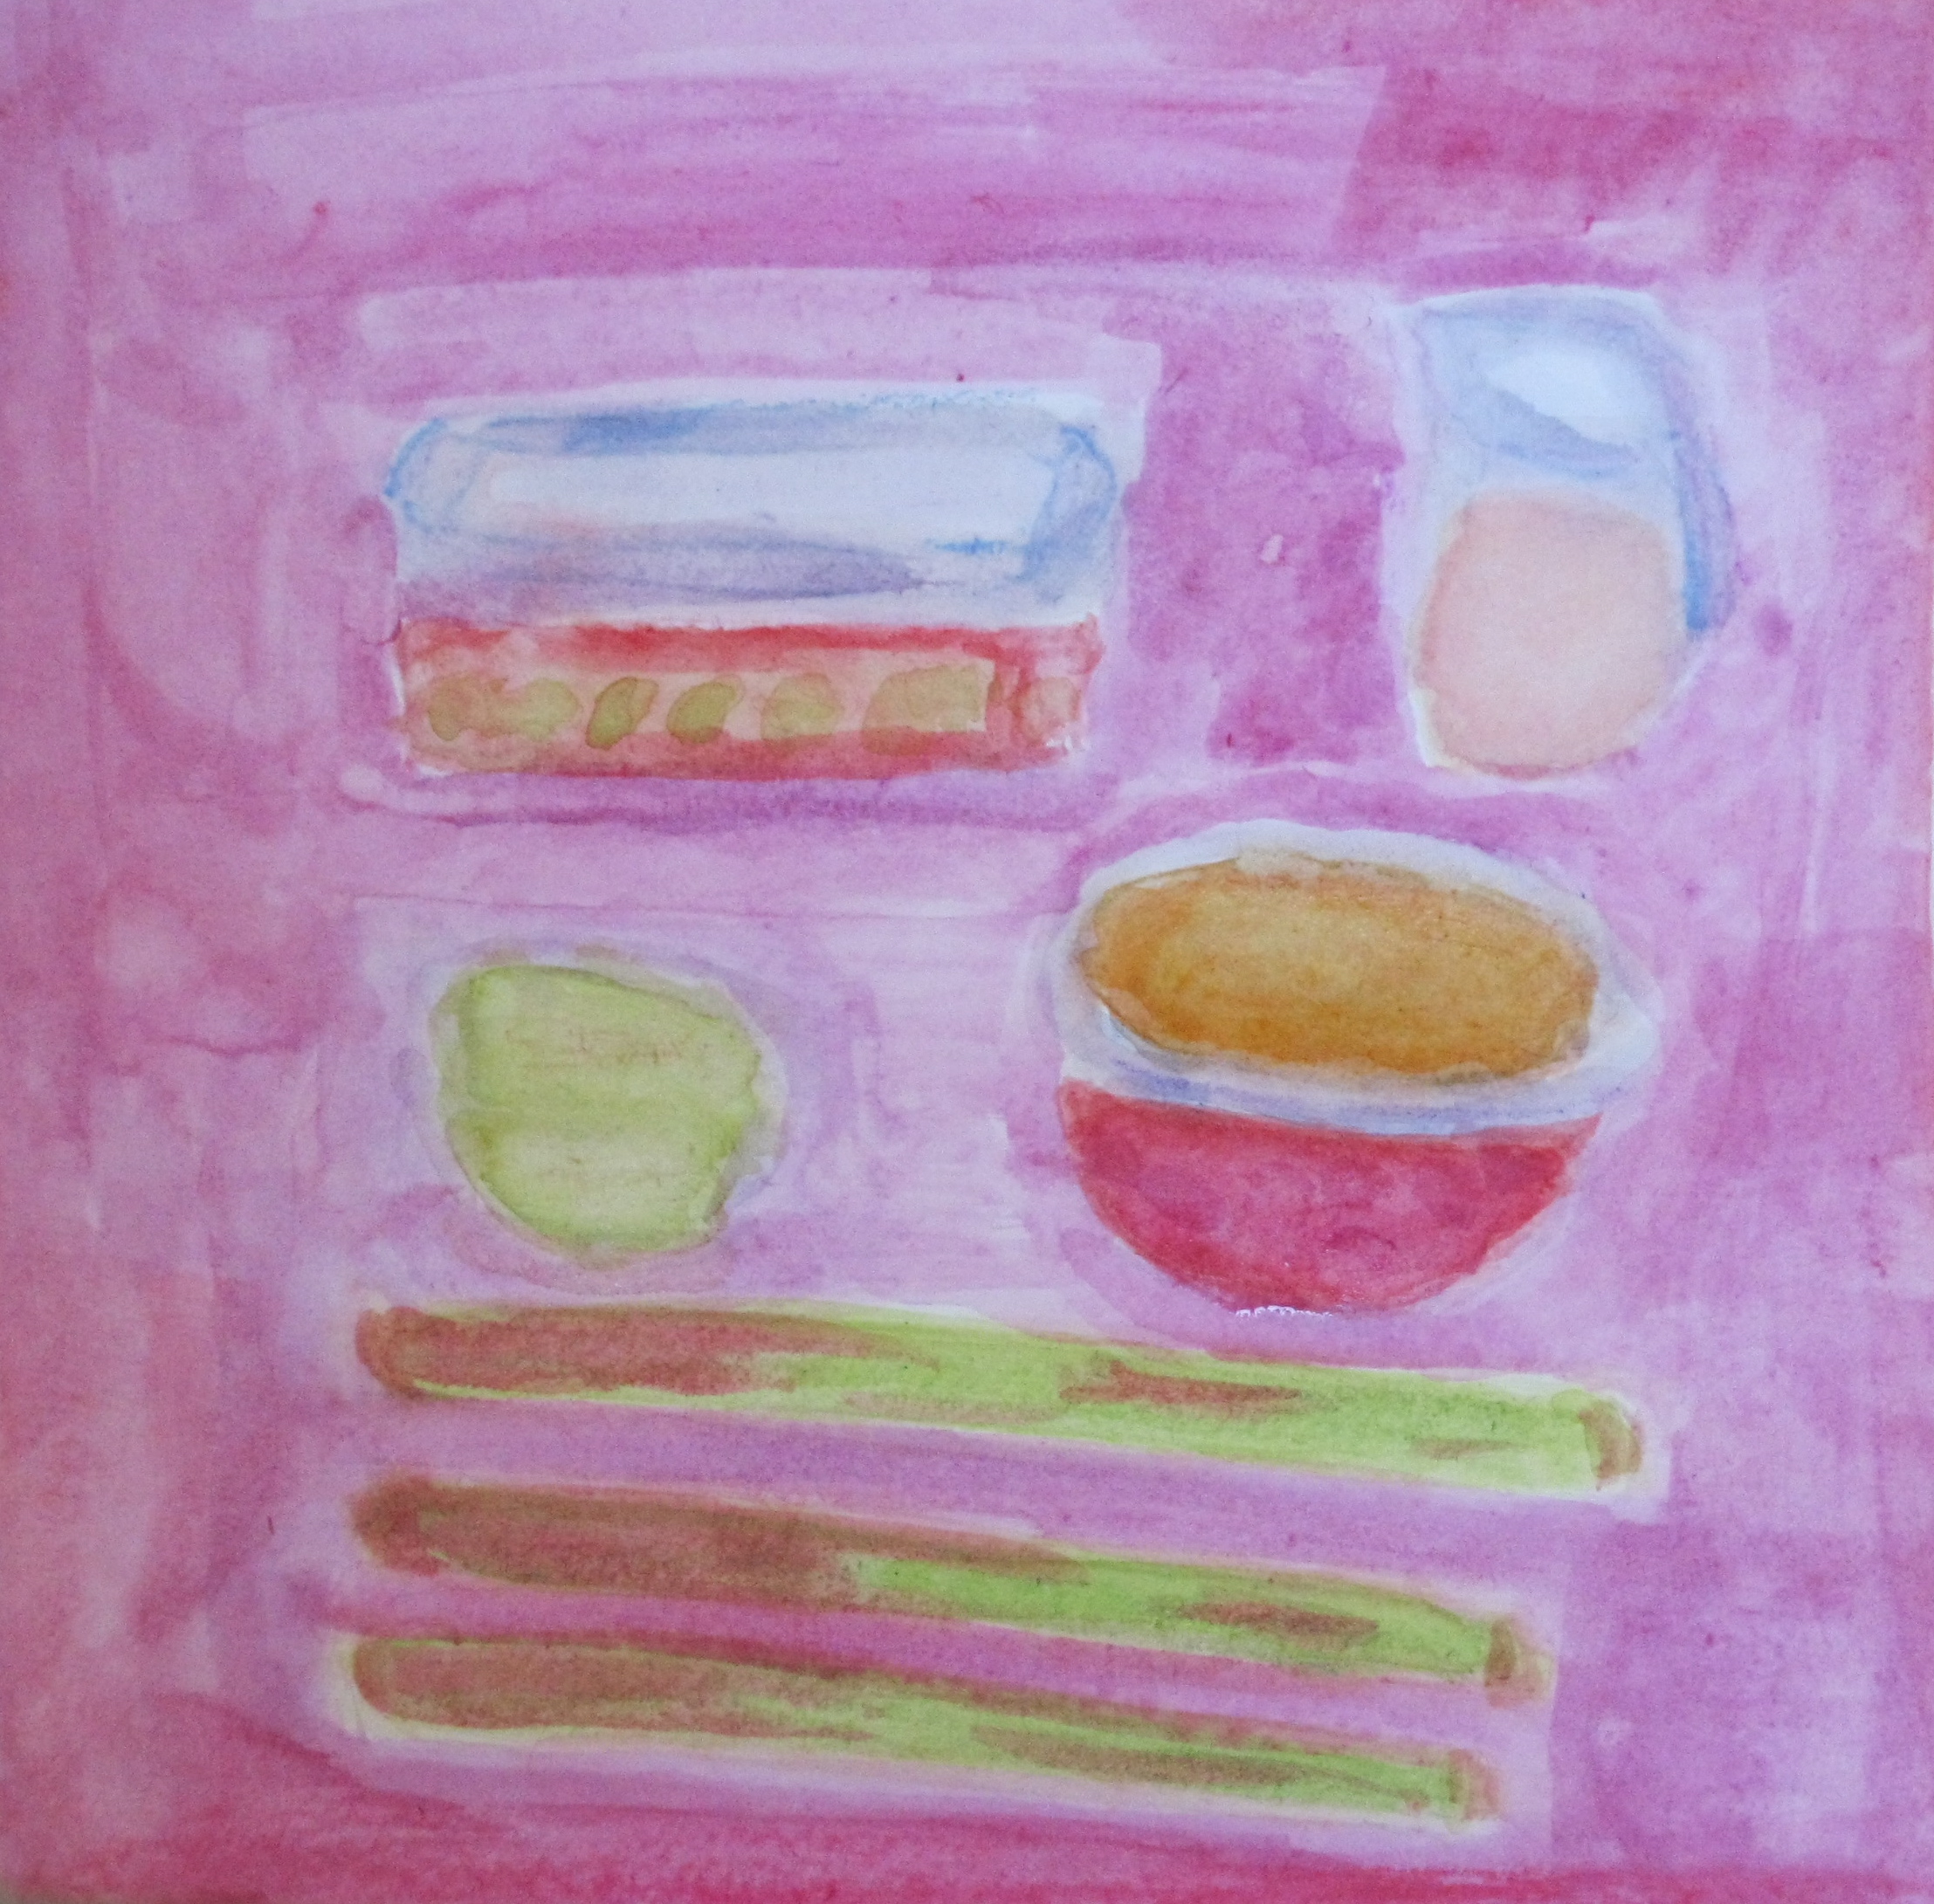
Original painting shows cherry plums, plum cake, plum caramel.

Plum Cake. 9″ x 12″ Gouache and Watercolor Pencil on Paper. Sharyn Dimmick.

Sometimes circumstances conspire to create an end. Today is my sister-in-law’s birthday and she is coming over to go out to lunch with my mother in Walnut Creek. Barbara likes plum cake. I had half a colander of fresh cherry plums on the counter and a jar of wild plum jam that I needed to use. I had just read David Lebovitz’s blogs on butterscotch sauce (which I am dying to make) and peach cobbler, plus a post on plum cake made with cornmeal from Two Peas and Their Pod. Barbara loves whipped cream. So what would I do? I would make the cornmeal-plum cake, adapting it a little to give it a more butterscotch-y flavor by substituting some evaporated cane juice for half a cup of the white sugar and I would use the jam to make some plum caramel to serve with the cake.

For the plum caramel, I followed a recipe from Chez Panisse Desserts, except, instead of cooking fresh plums, I just added plum jam (aka cooked plums) to the caramel base, cooked it for a few minutes and strained the results. You can make simple caramel by putting 1/2 cup of sugar in a saucepan with 2 Tbsp water and melting it over high heat, shaking the pan every now and then (do not stir). When it takes on a pale golden color, remove it from the heat and carefully add 1/4 cup water, not getting too close to the pan. You can stir now. If you are adding fruit puree to the caramel, add it now (this works with any berry or stone fruit), add it now and cook for a few minutes over medium heat. Strain out any solids or seeds that have slipped through, put your caramel in a clean jar in the fridge and you are good to go for later. Fruit caramel is less acidic and more complex than simple purees and is perhaps my favorite recipe I learned from this cookbook.

Now the cake. You can see the original here. Since cakes are not my favorite things I followed the recipe closely with just two substitutions (okay, three). First, I had medium eggs rather than large — they were organic and brown — so I threw in an extra one. Then, I had lots of cherry plums rather than the four or five large plums cited in the recipe. I already told you I put in 1/2 cup of evaporated cane juice for 1/2 cup of white sugar. Oops. Um. Four substitutions. I substituted a quarter cup of sour half and half for some of the buttermilk because, you know, we had it, and it is similar, but richer.

So, this is what you get when you put together all of those substitutions with the original recipe:

Barbara’s Birthday Plum Cake

Pit the cherry plums you are using (Or pit and chop larger plums into bite-sized pieces). Set aside.

Preheat oven to 350.

Measure 1 and 1/2 cups unbleached flour. After measuring sift it into a small mixing bowl.

Whisk into flour 1 tsp baking powder,

1/4 tsp cinnamon

1/8 tsp kosher salt

1/2 cup corn meal

Then soften 1 and 1/2 sticks of unsalted butter (12 Tbsp)

Cream butter with 1/2 cup granulated sugar and 1/2 cup evaporated cane juice until light and fluffy.

Add — one at a time — 4 medium eggs (or use three large), incorporating egg fully before next addition.

Measure 1/2 cup buttermilk (or 1/4 cup sour cream or sour half and half, plus 1/4 cup buttermilk, which is what I used).

Alternate flour mixture and buttermilk, in increments, starting and ending with flour.

Butter and flour a cake pan. I used a bundt pan because it looks festive.

Scrape half of the batter into the pan. Scatter plums over batter. Top with remaining batter.

Bake for fifty minutes. Test to see if it is done. In a bundt pan, my cake took one hour and five minutes to show some browning on the top and to pass the toothpick test.

Cool by hanging bundt pan on a glass bottle. This is fun. Trust me.

Serve with barely sweetened whipped cream and a pool or drizzle of plum caramel. If you are my sister-in-law, add more whipped cream. Enjoy.

Food Notes: Keeping to the art of substitution, you can use any sour thing for the buttermilk — yogurt, sour cream, creme fraiche, even sour milk. You can make the cake as originally suggested with all white sugar, or use all evaporated cane juice. You can probably use some other fruit for the plums, although the plums (with skins) provide a beautiful color and a nice tartness that plays well against the cake. The whipped cream provides yet another contrast (and besides, we like whipped cream when we are celebrating).

Watermelon pickle: I had a problem with the watermelon pickle — it wasn’t the recipe — it was me. so I’ll be trying it again with this week’s watermelon and report back on that later.
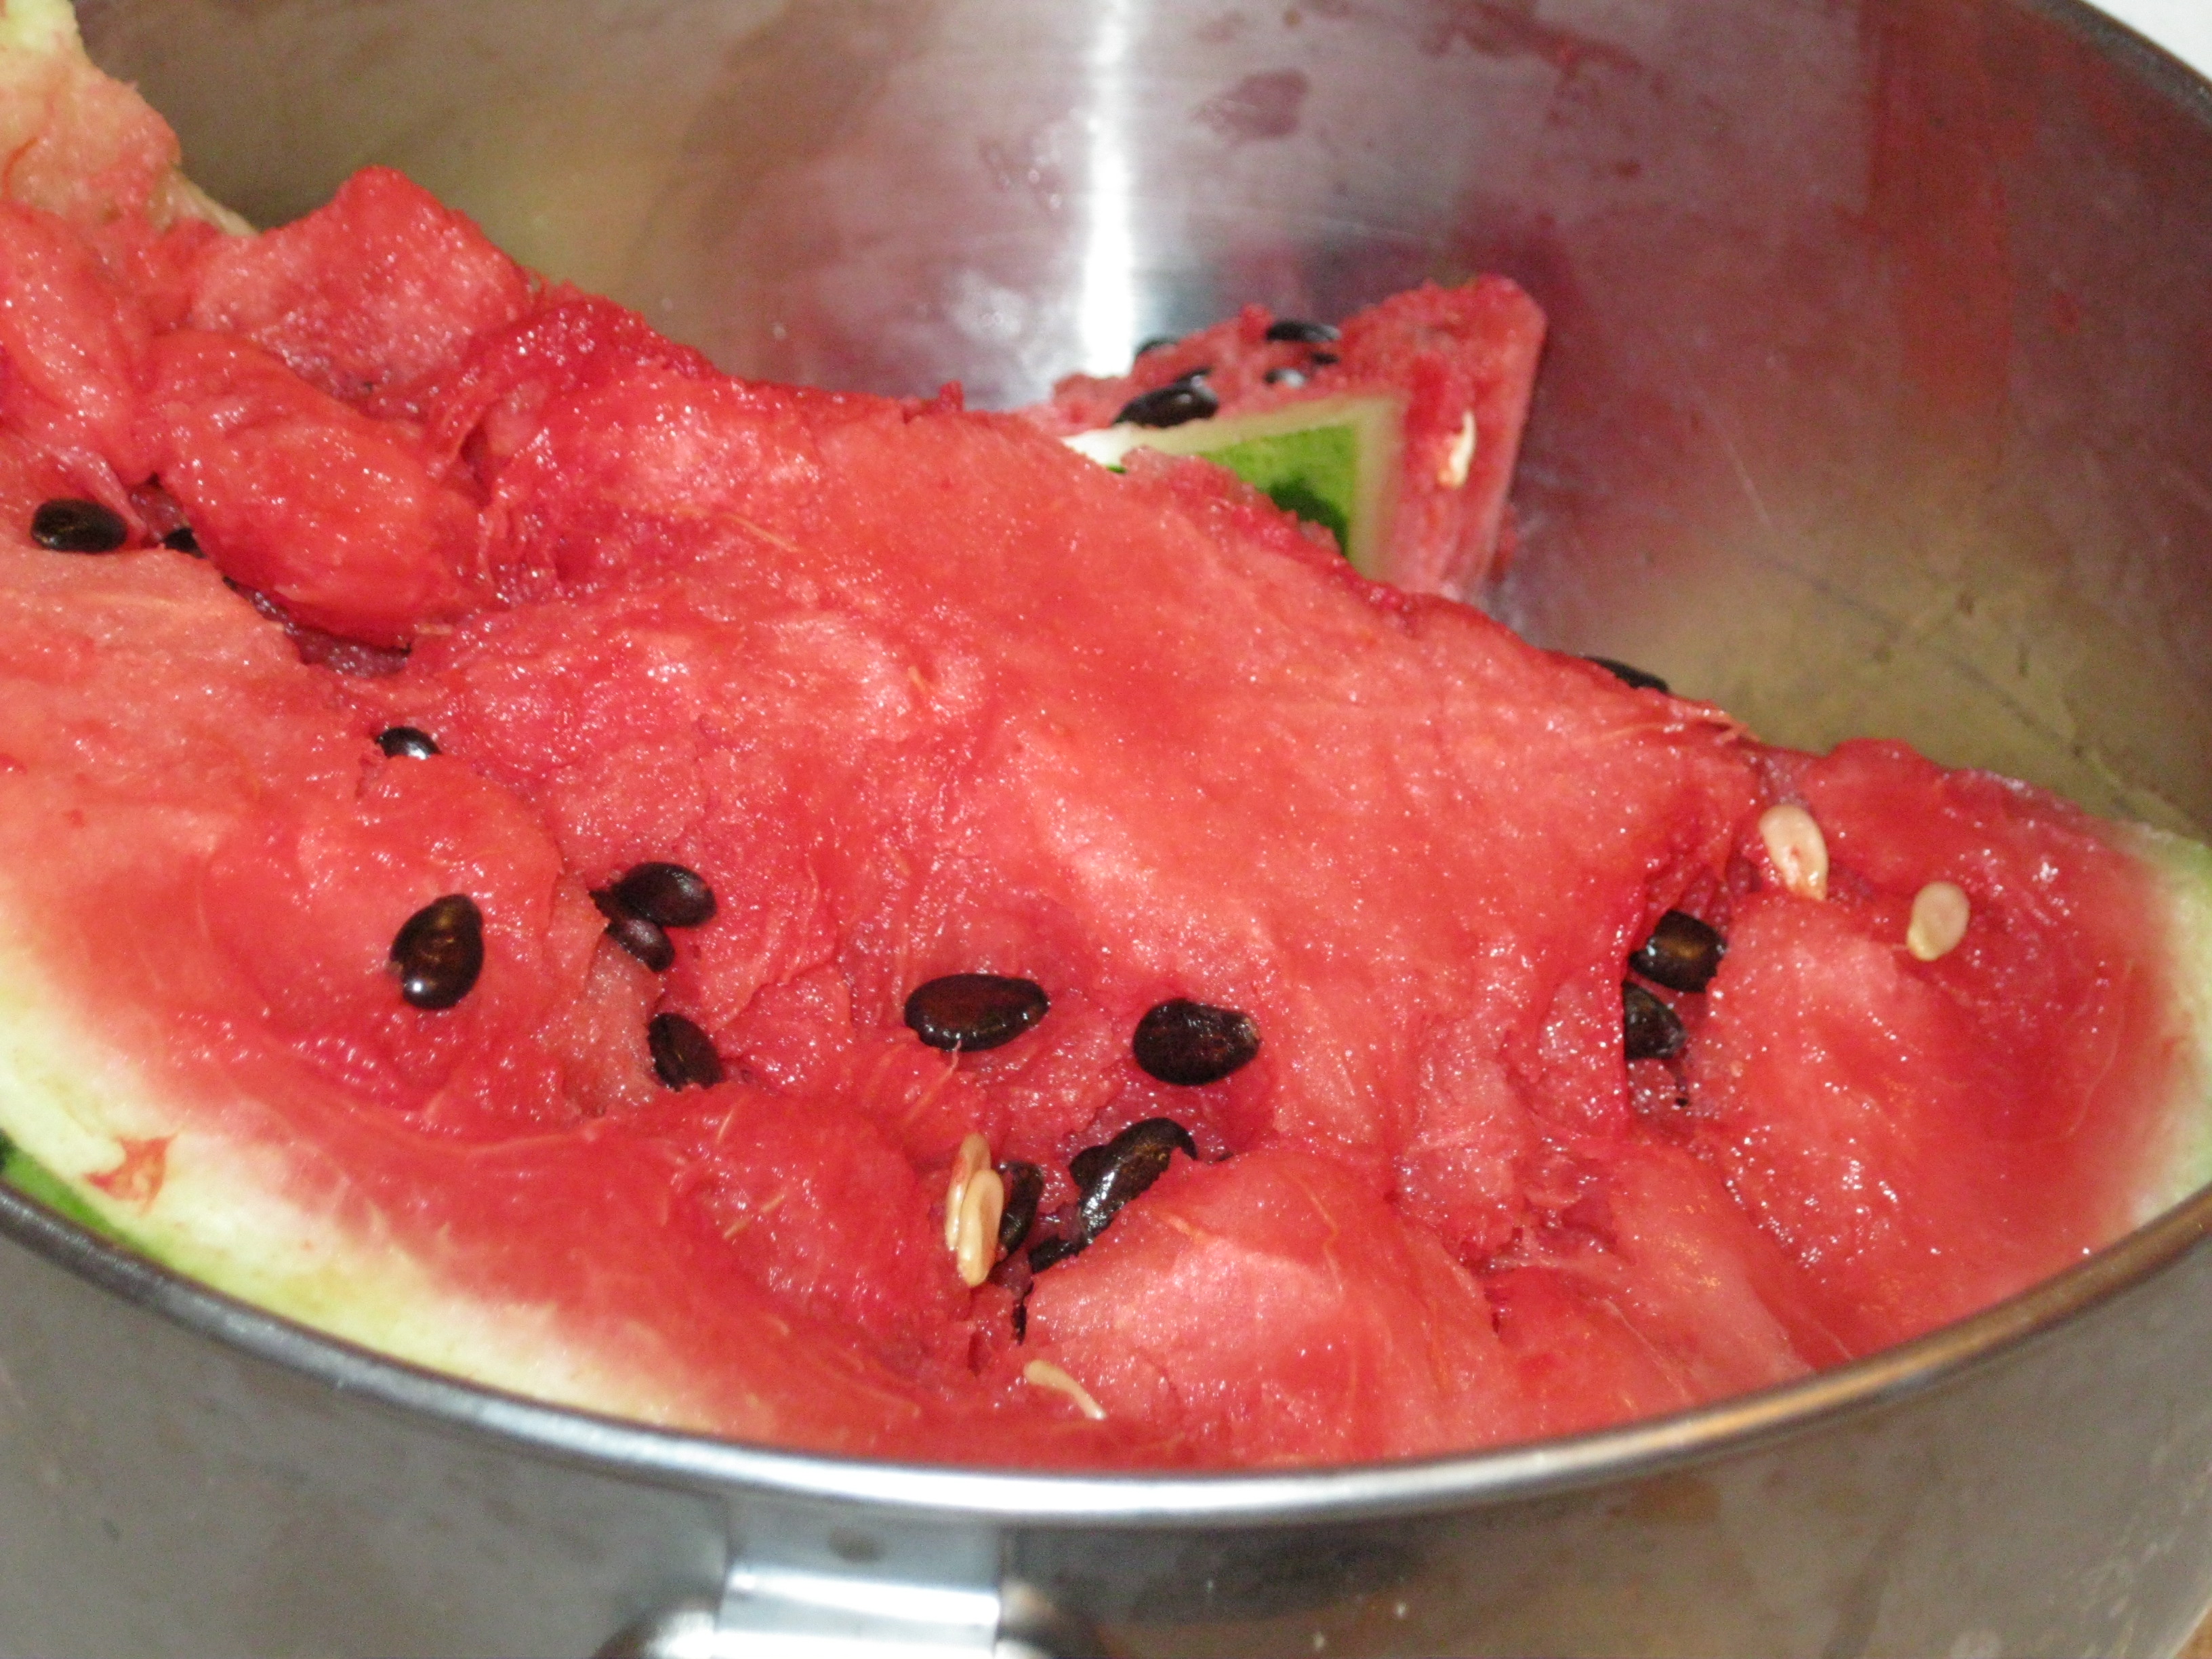
Photo of ripe red watermelon in steel bowl.

The one that got away — part of the watermelon that rolled off the counter.

On Wednesday I received a small watermelon from my Riverdog Farm CSA. Grown eighty-some miles away in summer heat, the melon was sweet and pink — I know because five minutes after I set it on the counter I heard an odd thunk: it had rolled off the counter and split open when it hit the floor. There would be no saving this watermelon for later. I picked it up, washed it off and tasted it. Good. Then I set it aside for a few days as the temperature took a nosedive and the fog rolled in to stay — who wants to eat watermelon in fifty-degree weather?

Fortunately, I had a plan for some of this watermelon: when I bought my Nesco American Harvest dehydrator the booklet contained this sentence: “Cantaloupe and watermelon slices become candy-like when dried.” Candy-like. Hmm. Then Krista and Jess reported on their dried watermelon chips. I knew I had to try it when watermelon came along again.

I spent an hour in the kitchen this morning, cutting 1/2 inch thick slices of watermelon, removing the seeds and cutting the rind away. The easiest way to do this proved to be to cut a slice and then slice through the melon perpendicular to the rind to produce small batons or wedges and then to cut the rind away. After half an hour of this, I noticed that I was developing a neat pile of watermelon rind.

Now, I am one of those people that, if you give her a slice of watermelon, will eat deep into the rind. Watermelon rind reminds me of cucumber with no bitterness and no seeds. And yet, because Mom doesn’t can, I have never made watermelon rind pickles. I called her into the kitchen and asked, “Back in the day when you ate watermelon pickles, were they sweet or sour?”

“Not sweet enough,” she said.

“Sort of like bread and butter pickles?” I asked.

“Not as good,” she said.

She told me to look in the old Mowequa cookbook, but I headed upstairs to check my saved blogs file. Not too far into the seven hundred recipes I had saved was Natalie’s recipe for watermelon pickle. I have started to make it and will report on the results on Wednesday.

Painting depicts apple pie ingredients: flour, butter, apples, cinnamon, nutmeg.

Gravenstein Apple Pie 8″x8″ gouache and watercolor pencil Sharyn DImmick

Things to make right now: Gravenstein apples are in! Ann and I picked a big bowlful of them from a yard in Berkeley and Mom made our first Gravenstein apple pie of 2012. I cannot say enough good things about this pie so if you are lucky enough to live within range of Gravenstein apples, by all means, get some. Bernie at the Berkeley Farmers’ Market has them right now if you don’t want to forage for them, or if you need more. I also made zucchini-feta pancakes this week. This time I threw a little leftover pesto with the fresh herbs and feta — it’s a delicious variation. As I write this I have another peach and plum crisp in the oven, this time made with white and yellow peaches and little cherry plums from someone’s backyard tree. And two days ago I made this tomato tart, again with lemon cheese, but with brown mustard and shredded tarragon. And of course this is a good time for Deborah’s somewhat famous tomato platter or Greek salad, with tomatoes and cucumbers in the market and peppers beginning to come in.

Photo of watermelon candy, aka dried watermelon

Watermelon candy in the dehydrator.

The watermelon candy is small and sticky — it reminds me of dried tomatoes, only sweeter and pinker. I was catching up on my sleep today after nearly a month of periodic insomnia so I didn’t take the time to do a new painting. Instead I offer you photos of watermelon and watermelon candy.

Original watercolor painting shows bowl of fruit salsa and ingredients.

Peach-Plum-Corn Salsa. 6″ x 6″ watercolor pencil on paper. Sharyn Dimmick.

I have my foot in several art camps: I hang out with writers at retreats. I meet regularly with groups of local folk musicians. And this past weekend I had the opportunity to attend to wrap-up party for the July 2012 Caerus Artist Residency in Sonoma County with my best friend (and Caerus co-founder) Suzanne Edminster.

I prepared a dish of fresh peach, plum and corn salsa, inspired by this recipe, and bought some blue and yellow gluten-free corn chips at the Santa Rosa Safeway. When I got to the party, the hostess gave me a bowl for the chips and I put my old, scarred Tupperware container on the table next to them. Other guests arrived, bringing fruit pies, buffalo wings, blackberry-apple crostata, pasta and green salads. The table held napkins, plastic forks and knives and paper plates.

I am used to folk music parties, which go something like this. Each person arrives and plunks something homemade or store-bought on a central table, greeting each other and often asking, “What did you bring?” Once people have dispensed with kitchen chores and stowed their instrument cases we take seats around the table and begin to chat and eat. It is only after we have served ourselves food and talked for awhile that someone will say, “Bill, do you have a song?” Or a late arrival will ask, “Have you been singing?” We say. “No, we’re still eating,” or “We haven’t sung a note.”

Musicians are always hungry. They congregate in kitchens where the acoustics are good, leaning against the counters. Opera singers cannot eat much before a performance, but feast afterwards — it doesn’t feel good to sing on an overly full stomach.  After a performance you are high on music, full of energy and ravenous.

Eventually at music parties everyone has had her fill and we start to sing, often taking turns going around the table. Some of us have tradtitional places or chairs we like to sit in. If it is big party, the tune-players will slip away to other rooms, leaving the singers to themselves. If it is a small gathering we will remain around the table all day.

The Caerus artists behaved differently. They sat their dishes on the table and started looking around. Some looked for places to display their art: an easel, a window seat, the edge of a wall. Most of them did not seem in a hurry to eat: they wanted to wander around and look at the art as though they were at an opening, carrying their small plates and congregating in groups of two or three. They ate alright, but they ate on the fly. My friend Suzanne says artists graze. I say that they are too busy to look around to eat seriously, but they will notice if the food is beautifully presented and admire serving dishes and particular utensils. These may be the people who say, “That looks too pretty to eat.” To a folk musician, there is no such thing as “Too pretty to eat” or “Too ugly to eat” either — if it is edible, someone will eat it.

At the Caerus party I parked myself in a chair next to the table (old habits die hard) and had conversations with whoever happened by. I stood out by not standing.

In case you are wondering what writers do at parties, in my experience they hug the table and yack: telling stories is the next best thing to writing them or reading them. And, in case you are waiting for a recipe, this is how I made the salsa.

Fresh Peach, Plum and Corn Salsa:

Chop 2 medium plums and 1 yellow peach into bite-sized pieces. Place in a medium-sized bowl.

Squeeze juice of 1 lime over the fruit.

Lightly steam two ears of corn and cut the corn from the cobs. Add corn to bowl.

Chop half a bunch of cilantro into mixture

Finely dice a small red onion. Add to bowl.

Cut 1 jalapeno pepper in half. Discard half of the ribs and seeds, reserving the other half. Mince the reserved ribs, seeds and jalapeno flesh. Mix thoroughly and allow several hours for the flavors to blend.

Food notes: I used Santa Rosa plums, a yellow peach and two ears of yellow corn, but you can use any plums, peaches or corn that you like. If jalapenos are too hot for you, discard all of the ribs and seeds before using and up the quantities of fruit and corn. If you freak out at cilantro or are allergic to it, substitute mint or fresh basil. And, of course, you can make it more acid by using more lime, more piquant with more onion. It would be delicious in a corn and cheese quesadilla or served alongside grilled chicken or fish. The original recipe calls for cumin, which I love — I just forgot to put it in this time.

Original watercolor painting shows fruit crisp and ingredients.

Peach and Plum Crisp. 8″ x 8″ Gouache and acquarelle on paper. Sharyn Dimmick.

I am not the most informed person in the world: I find that reading a daily paper depresses me and paralyzes me with all that I don’t know and all that I can’t do about things. I watch Bill Moyers on PBS and occasionally dip into The Newshour. I read a local weekly rag, The East Bay Express, sometimes focusing on the astrology column and the restaurant reviews, although I usually read the cover story. Other than that, I get my news from Facebook updates and a few chosen sources that I subscribe to.

Because of that, I learned about the movie theater shootings in Colorado on Facebook on Friday afternoon. A friend of mine, Deby Dixon, posted a link to a blog she wrote about the brevity of life and the importance of following your dreams while you have time and health because none of us know when our life will be cut short, when our health will fail, when life or death will intervene in some unexpected fashion. Deby wondered if some of the people in Colorado died wishing that they had gotten to some dream of theirs. Deby’s story and her reflections moved me to tears and I asked permission to share it with you. You’ll find her post here, along with some of her photographs: Deby is traveling and photographing the beauty and majesty of our national parks.

What do you do when life smacks you down, when you suffer a loss? You grieve. You tell the story to others. You seek comfort. Perhaps you seek to comfort others. What comforts me in my most dire straits is beauty. Which is not to say that beauty makes me feel all better right way: beauty breaks open the heart, opening it up to the full catastrophe of grief, but beauty also helps you bear having your heart open in its pain. Beauty is a reminder that in the face of loss there are moments of great beauty and tenderness, that we are in this together, that the sun rises even on our worst day, scattering light through the atmosphere. Sometimes it doesn’t seem fair that the sun is shining — how can it be when we have suffered such a blow?

How to deal with a tragedy on a food blog? When you are grieving, it can be hard to eat. But you need to eat. In my hardest times I have found it was easier to eat with other people, that I could eat a few bites in the company of a trusted friend if I could not eat alone. So my recommendation for you this weekend is that you find some way to share a meal with someone else. It could be a version of David Lebovitz’s tomato tart.

You could go to a potluck and bring a loaf of bread, a dessert. a salad. What matters is that you eat with others to ease your hearts and theirs. And that someone puts something beautiful on the table: a vase of flowers, a special tablecloth, a rose from the yard, a silver pitcher, a photo of your best beloved.

Original ink and watercolor sketch of old Harmony guitar.

Harmony Guitar #3. 5″x 7″ ink and watercolor on paper. Sharyn DImmick

After I heard about the shooting in Colorado I spent a few hours sketching my old Harmony guitar that I got from a pawn shop in San Francisco. I listened to music as I worked. The Harmony is beat up, but has a sweet tone: to me it is beautiful. I share it with you and I urge you to look at Deby’s photographs and, possibly, to listen to some music you love, hymns or loud rock and roll — it matters only that you love it.

A simple seasonal dessert we have been eating lately around here is mixed peach and plum crisp. I’ve been making it with fresh Santa Rosa plums (both from the farm box and from my sister-in-law’s tree in Vallejo) and fresh peaches from Frog Hollow Farm. I usually use a Betty Crocker apple crisp recipe for the proportions of the topping ingredients and make the topping with rolled oats, unbleached and whole wheat flours, butter, brown sugar, nutmeg and cinnamon, but a few weeks ago I made a gluten-free version to take to a party: what I did was use more oats and substitute a couple of tablespoons of cornstarch for the flour (Oats are gluten-free if you make sure to buy oats that have not been processed in a facility that also processes wheat and other grains). You can make it either way. I usually make it in an 8″ x 8″ Pyrex pan, but sometimes I double the topping amounts, use more fruit and bake it in a 9″ x 13″ pan.

Gluten-Free Peach and Plum Crisp

Preheat oven to  350.

Slice enough fruit to cover the bottom of an 8″ x 8″ square pan. If you have small plums, it might take a whole bag; if you have average plums, use four or five, plus four or five peaches.

Combine 1 cup gluten-free rolled oats and 2 heaping tablespoons cornstarch.

Add 1/2 cup  brown sugar, plus nutmeg and cinnamon to taste.

Cut in 1/3 cup butter.

Sprinkle topping over fruit.

Bake for 35 minutes or until sufficiently browned to suit you.

Serve with creme fraiche, whipped cream, burnt caramel ice cream, or just with a little milk or cream drizzled on top. Share with someone.

For the standard version, use 1/2 cup of flour, 1/2 cup of rolled oats and the same amounts of butter, brown sugar and spices as above and follow the same baking and serving instructions.

I was excited to see rhubarb at the Berkeley Farmers’ market last Saturday — I think it is the first time I have seen it there. I had seen a delicious-looking recipe for a rhubarb-cherry crumble with fresh ginger on local kitchen, one of the blogs I always enjoy reading. Kaela preserves a wonderful variety of jams, pickles and marmalades. Here was a crisp that I could tackle easily with cherries in season.

I have had few encounters with rhubarb in my life. My mother never cooked it at home, although she ate it as a child in Illinois. Neither of us like cooked strawberries, preferring to eat them raw, so strawberry-rhubarb pie is not in our pie arsenal. I once ate some rhubarb pie at a doll class potluck — the baker thought its pink color was particularly appropriate for a group of women artists. While I didn’t have to choke it down, I didn’t jump for joy and ask for the recipe either.

Now, if rhubarb grew abundantly in our yard or if a neighbor left baskets of it on our porch I would figure out how to make it palatable or resort to ferreting out all of my rhubarb-loving acquaintances and foisting it on them. Riverdog Farm has not included it in a box in the last five years either. But a couple of years ago I had had my best encounter to date with rhubarb: Toni, who grows it in her Oakland yard, smothered it with brown sugar, dried fruit, nuts and sweet spices, popped it into the oven and roasted it. The result was brown and syrupy and sweet. But when I asked her for the recipe this year she could not remember ever making it that way, a brilliant improvised recipe lost to the world.

When I bought the rhubarb last week, I tasted it cautiously at the bus stop, breaking a small piece off the end of a raw stalk. How sour would it be? I am happy to report that it didn’t lock my jaw. The taste reminded me of chewing sour grass when I was a kid, faintly reminiscent of lemon and green plants. But rhubarb is one of those things like quince — most people do not eat it raw. Cooking transforms it, but tasting it raw does not help you plan how to cook it.

painting shows rhubarb in various preparations.

Rhubarb Experiments. 8″ x 8″ Gouache and Watercolor Pencil. Sharyn Dimmick.

This morning I turned to the guidelines of other cooks: what have they done with it? Well, they boil it with sugar, raw or white or brown. They stew it with prunes and apricots. They combine it with strawberries in pies and compotes and jam. Enterprising cooks use it in sauces for roast pork. I hunted through some cookbooks for awhile. Then I cut and measured my remaining rhubarb: I had three cups left.

Fine. Enough for three small experiments. Experiment #1, rhubarb roasted with vanilla bean and Creme de Cassis, suggested by The San Francisco Ferry Plaza Farmers’ Market Cookbook. Experiment #2, rhubarb cooked down to a syrup, a variation on Heidi Swanson’s Rhubarb and Rosewater Syrup recipe. Experiment #3, rhubarb cooked in a compote with dried fruit, adapted from the Eat Fresh, Stay Healthy cookbook, an offering from the used book sale at the Kensington Library.

Experiment #1, the roasted rhubarb, smelled wonderful, both before and after baking, from the perfume of the vanilla bean and the Creme de Cassis. This rhubarb, mostly pale green with red ends remained green after roasting. The syrup has a slight dark red tinge. I tasted the result cautiously, one piece on a small spoon. It is delicious. The white sugar, vanilla and black currant liquor have mellowed the rhubarb into something tasty: I could eat it straight from a bowl, topped with cream, milk, half and half or yogurt, or I could mix it into cereal.

Experiment #2, rhubarb syrup, essentially rhubarb simmered in a simple syrup to which I added a vanilla bean, tasted good, with just a hint of rhubarb flavor. I used 1 cup of rhubarb, 1 cup of sugar, 1 cup of water and 1/2 of a vanilla bean. I let the rhubarb marinate in the sugar for a couple of hours before I added the water and brought it to a simmer. I strained the syrup from the cooked rhubarb. It came out blush pink. I tried an ounce of it in about four ounces of sparkling water with lime. I also tried an ounce of it in some cold tea. I’ll eat the leftover sweetened rhubarb puree with some light cream for dessert some night this week, or stir it into my morning cereal. It is too early in the day to put some of the syrup in a glass of sparkling wine, but I may get to that.

Experiment #3, the compote, may be the least successful. I simmered 3/4 cup dried prunes and 1/4 cup dried apricots in a cup of water with some nutmeg, fresh ginger and 1/3 cup of sugar before adding the rhubarb for five or six minutes. The problem with this is that the rhubarb has not absorbed the flavors before it begins to break down. But it may taste better tomorrow after sitting — compotes often do. I tasted it warm.

I brought the rhubarb-cherry crumble to a singing session on Friday. Some people liked it. I was disappointed. The color was lovely: the rhubarb and cherries melded into a deep red. The fruit proved to be too sweet for my tastes (I was afraid to scant the sugar due to my inexperience with rhubarb preparations) and there was an off-putting flavor, which I believe was the taste of the rhubarb. I made a crumb topping with butter, homemade granola (not very sweet), brown sugar and a few tablespoons of flaked coconut. I thought the topping was also too sweet and will go back to using plain rolled oats in crisp topping (Local Kitchen’s recipe calls for a gluten-free topping with  brown rice flour, oats, butter, and flax seed).

Food notes: If you are a confirmed rhubarb lover and have no fear of canning, you might want to try Local Kitchen’s rhubarb prosecco jelly. It’s the sort of thing I would love to have a taste of, but would not want to commit to making it unless I had tasted it first. Disclaimer: I have been exercising a lot lately, which might be why the sweet rhubarb syrup, roasted rhubarb and puree suddenly tasted great…

P.S. I mixed rhubarb compote into my blue corn cereal this morning and it was just fine: with the heat of the cereal, the cooked rhubarb melts into the compote and what you get is a spicy syrup. And rhubarb syrup in water is nice on a hot day.

It is cherry season in California. For a few short weeks in May or June fresh cherries appear at the Farmers’ Market in Berkeley. First there are Brooks, then Burlats. Later there are Bing cherries. I eat them all. Mostly, I eat them fresh, for a snack. Lately I have been sneaking them into my morning cereal: my current favorite concoction involves 1/3 cup blue cornmeal cooked in 1 cup of milk with a bit of salt, a small handful of raw almonds pounded in a mortar, a handful of stoned cherries and a couple teaspoons of shredded coconut. This is also good with rolled oats — if you use oats, use 1/2 cup.

Do any of you have binders full of recipes that you have clipped from the food sections of local newspapers? Do you have a lot of recipes you haven’t actually cooked? Me, too. Sometimes I try one and toss it out with a “What were they thinking?” gesture. Sometimes I learn something. Sometimes I just store them, loosely organized by main ingredient, in a huge binder that takes two hands to lift off the shelf, but I know they are there waiting for “someday” when I’ll cook them.

Cherry Focaccia with Chocolate.

One such recipe was Ed Murrieta’s recipe for cherry focaccia. A Google search for the original publication date in the Contra Costa Times informed me that I have been saving this recipe since June 7, 2004. I saved it because it has an irresistible photo of a golden brown round focaccia, dimpled with cherries, cut into wedges, with a pile of fresh cherries in the center. It looks so pretty that I wanted to make it “someday.”

Well, folks, today was someday. I made a trip on the bus to the Farmers’ Market yesterday to buy more basil for more pesto and to buy cherries for this bread. Insert disclaimers here. One, I don’t generally like focaccia — it is too thick, too bland, with the wrong ratio of toppings to crust: I think of it as failed pizza. Two, I think chocolate-covered cherries are revolting. My Grandmother liked them: nasty, sickly cherries in too sweet milk chocolate. And cherry cordials, worse, if possible: bad chocolate filled with wet cherry filling that squirts you when you bite into it. Yuck. Three, my favorite cherry recipes involve sour cherries, either canned or dried, since fresh sour cherries are hard to come by in this part of the world. Four, I can’t stand anything cherry-flavored: cherry flavor reminds me of medicine. This includes cherry Starbursts (why, oh why?). The only exception I can think of is Royal Crown Sour Cherry candy — do they still make it anymore?

But this cherry focaccia was calling my name. First of all, it is a filled focaccia: you make two circles of dough. You put fresh, pitted cherries on top of the first circle, sprinkle it with chopped bittersweet chocolate, and put the second circle on top. Then you push more cherries into the top layer and sprinkle it with raw sugar before it goes into the oven. Plus, you need a starter to make this and I keep a jar of sourdough starter in my refrigerator at all times. I fed the starter yesterday and let it sit out on the counter while I went to the market and bought cherries.

I wanted to send you to Ed Murrieta for the original recipe, but when I Googled him the first thing I found was an article about how his entrepreneurial business had failed, leaving him to live on food stamps. Then I found some recipes including marijuana. Wherever he is now and whatever he is doing I wish him well and thank him for this gorgeous focaccia recipe. I could send you to the newspaper site, but they seem to want you to activate a free trial subscription to let you read the recipe. What can I do? I can rewrite the recipe — I did make a couple of changes.

Here’s the bad kitty confession. Murrieta’s recipe calls for bread flour. In my heyday when I had a regular job and regular paychecks I would have gone out and bought bread flour. I would have insisted on bread flour. Now I am not so proud or so picky: I use what we have on hand. I am an experienced baker and can handle sticky doughs and doughs behaving badly. So I will tell you that Ed Murrieta called for 2 and 3/4 cups of bread flour, plus additional flour on the board during the kneading and shaping phases. I winged it with unbleached flour and some whole wheat flour to give it a more rustic quality. I’ll show you.

Murrieta called for a starter made  of 1/2 tsp dry yeast, 2/3 cup of water and 1 cup of bread flour. You mix this up in a glass jar with a wooden spoon, cover it with cloth and let it ferment on the counter for at least twelve hours (and up to 36). I skipped this, and just added 2/3 cup of my sourdough starter to the dough. If you already have a starter, you are good to go. If you want an official sourdough starter recipe, go here.

Focaccia stuffed with fresh cherries and chocolate.

Cherry Focacccia. 8″ x 8″ gouache on paper. Sharyn DImmick.

Fresh Cherry Focaccia with Chocolate

Make the dough first. You can pit cherries and chop chocolate while the dough rises. You can even go to the store for cherries and chocolate while the dough rises if you don’t go on the once-every-forty-five-minutes bus.

Dissolve 1 and 1/2 tsp yeast in 1 cup warm water.

While the yeast proofs, stir together in a large bowl 2 and 3/4 cups bread flour, 3 Tbsp sugar and 1 tsp kosher salt. If you do not have bread flour and are intrepid, start with 1/2 cup whole wheat flour and 3 and 1/4 cups unbleached flour (You will have to add more).

Make a well in the center of your dry ingredients. Add proofed yeast, 2/3 cup sourdough starter (or Ed’s starter, above), 1 cup lukewarm water and 3 Tbsp olive oil. Mix with wooden spoon until a light dough forms. If your dough is more of a batter than a dough, add flour 1/4 cup at a time.

Flour a bread board or other work surface and keep the flour handy! You might want to make sure your flour bin is at least half-full. Turn out the dough onto the board and attempt to knead it. If it sticks to the board badly, knead in more flour, dust more flour on the board, pry it up and try again. Eventually, you will work enough flour into the dough that it resembles roll dough and is smooth and uniform in appearance. If you are smart, you will oil the bowl before you put the dough back in it to rise. Cover the dough with a damp tea towel and let it rise until double — 1 and 1/2 to two hours.

Now, go away and amuse yourself or clean your counters and put away your ingredients except the flour — you are not done with that. Before the dough is risen you will need to pit 2 cups (one pound) of cherries and chop four ounces of chocolate. I used a 70% Lindt bar that had cherries and chili in it.

When your dough is risen, put it on your floured board and let it rest for five minutes. You can use this time to oil a pizza pan or baking sheet.

Divide dough into two equal portions. Ignore one while you flatten, dimple and pull the other into a ten inch circle. See pizza-pulling instructions here. (Murrieta rolls out his). Transfer first portion to oiled pan. Spread 3/4 of your cherries on it and top with chopped chocolate. Flatten, dimple and pull the second circle into shape and place it on top of cherry-chocolate filling. Pinch the edges to seal the dough. Then decorate the top with the rest of the cherries, pushing them cut-side down into the dough at attractive intervals. Let the dough rest for thirty minutes while you preheat your oven to 400 and do a round of clean-up. Just before you put the focaccia in the oven sprinkle it with raw sugar.

Close-up photo of Cherry Focaccia.

Cherry Focaccia Close-up. Photo by Sharyn Dimmick.

Bake for forty-five minutes or until top and bottom are browned to your liking. Murrieta says to let the focaccia cool and then cut it into wedges. Ha, ha, ha, ha, ha. I let it cool for approximately five minutes and then cut a small wedge, which I ate standing at the cutting board. Then I reached for the knife again, which was smeared with melted chocolate. I ate the second piece standing in front of the board. Then I cut a much smaller wedge. Then I stepped away from the cutting board, drank a glass of milk and made tea, which I took upstairs so that I did not stay in the kitchen eating focaccia.

It was that good. It was sort of like someone had taken my two favorite things, crusty bread and pie, and magicked them into a single entity. Crusty, gooey, chocolatey, not too sweet, with a fresh cherry taste on top.

Cherry season is short. If you like bread and pie, make this now. Now. And invite some friends over if you don’t want to stay in your kitchen eating the whole thing. You could just call it cherry Kryptonite.

Food notes. This recipe is perfect as is, once you get the flour right. But it is ripe for variations. Try other kinds of chocolate and other kinds of fruit: fresh figs? And then branch out and use almond paste or ricotta filling with cherries or peaches or blueberries. Yum.

Maybe it was walking up hills for three days, which rendered me tired and lowered my resistance. Maybe it was reading the second installment of Jackie’s “What I Ate Last Week” at Marin Mama Cooks (It is fun to know the details of another person’s life and table). Maybe it was this hilarious account of food aversions called “Ten Gastric Ways of Making Me Talk.

It was lunch time. I was hungry. And on the way downstairs I decided to make my first green smoothie.

Some of you are saying “Oh no!” and thinking about cancelling your subscriptions. “She isn’t…” She’s gone too far.” “This is not going to make me love local, seasonal food.” “Run for the barf bag.” “Shh. You can’t say that on a food blog.”

painting of blender, fruit, spinach and the resulting green smoothie in a glass.

Green Smoothie. Sharyn Dimmick. 8″ x 8″ Gouache and Watercolor Pencil.

I had read about green smoothies. I had promised myself I would try one once when I had some strong-flavored ingredients on hand to offset the spinach.

In the refrigerator was a small bowl of fruit salad, that bowl that sits for days while you each wait for the other person to eat it: “Maybe she’ll eat it tomorrow….” And that fruit salad was made of fresh pineapple, organic strawberries rescued from the bargain bin and a few tangerines. Plus, I had a mango on the counter from our last visit to Grocery Outlet and I had a quarter of a bag of the fresh spinach that came last week. Green smoothie time.

I chucked the bowl of fruit salad into the blender with all of its juices. I cut open the mango, sliced and scored it, turning it inside out to release the mango cubes from the skin.

How much spinach? You didn’t think I was going to use a recipe, did you, or consult one? My guideline was not so much that it would be disgusting or overpower all of the other ingredients. Stripping off any thick stems I put in a small handful of leaves, maybe half a cup.

The blender whirred. When it was no longer chopping anything I got out a glass and poured a test taste.

First of all, it wasn’t green. It was orange- yellow with a green undertone and it was too thick to drink easily. But it didn’t taste bad at all.

Okay. Thinning. What was I going to use? I don’t like super cold drinks so ice was out. I have some indifferent raspberry sorbet in the freezer. Don’t need the sugar. Ah, yogurt — plain yogurt and more spinach.

I added two dollops of plain yogurt and another small handful of spinach, concentrating on the smallest leaves. The blender whirred it around again.

This time it was the color of an avocado face mask, the color of split pea soup. It was green. I poured it into the glass and tasted cautiously.

It did not taste like spinach. It still tasted faintly of mango and strawberries, more sweet than vegetal, with a tang from the yogurt. If I had had them, I would have added more strawberries, frozen raspberries or blueberries, or more pineapple. It was fine without them.

Since I don’t usually drink my lunch I wanted something to chew on (Where are the bar snacks?). I toasted a piece of sourdough bread to satisfy my teeth and jaws.

Should you make a green smoothie? I don’t know. Do you like wheat grass and other green things? Do you have a juicer, which will widen the ingredients you can put in it? Is it hot where you live and too late to cook lunch? Do you need to use a mango, some fresh spinach and some berries today? Do you have an appetite for all things new? Are you willing to try to drink your veggies because you refuse to eat them? Answering yes to any of those questions may predispose you to make a green smoothie at least once. I did it and lived to tell the tale.

I have been distracted this week, planning my life in advance, spending untold hours on the internet booking flights to and from Paris, reserving train seats, surveying my distinctly non-chic wardrobe with dismay and bemusement. It is odd spending the first few days of May madly thinking about mid-to-late June, when I will be at a writing retreat in Limousin with Natalie Goldberg and then in Paris itself.

Meanwhile, here in Kensington, our lone apple tree is in full bloom and spring crops slowly make their way into the farm box. Today I got snow peas and strawberries, asparagus and baby romaine lettuce, carrots and spring onions and braising greens. The breeze has blown all day. The sky is pale blue with wide filmy streaks of clouds.

The fruit and vegetables remind me of a meal I had last May in New York. Natalie had invited me and my friend and host Dorotea to lunch at her friend’s Manhattan apartment. Natalie and her friend had gone to a farmers’ market and come back with the first asparagus and strawberries of the season. Natalie fried up some gluten-free pancakes and set the berries and stalks on the table for our spring feast high over the Hudson River. Everybody but me tucked into the asparagus while I ate strawberries and pancakes for lunch.

May has come again and I am in my own kitchen. This morning I opened a bag of whole-grain blue corn that I stashed in the refrigerator when I last came back from New Mexico. The corn is fine-milled, pale blue with flecks of darker blue. I cooked up a quarter cup of it as a simple mush, boiling it in a cup of milk with a few grains of kosher salt and a small handful of dried sour cherries. The corn turned a lovely pale lavender color when cooked. I added a few drops of vanilla and stirred, then spooned up my breakfast, satisfied.

Blue Cornmeal Pancakes with Strawberries. 4″ x 6″ Gouache and Watercolor Pencil. Sharyn DImmick.

For tomorrow, I plan a simple elaboration. Tomorrow I will cook another pot of blue cornmeal mush, eliminating the cherries. I will beat in an egg or two, some flour, some milk, a few tablespoons of sugar and some baking powder. I will stir in 1 tsp of vanilla last. I will heat a skillet on medium heat, drop in some butter, swirl it in the pan and drop quarter-cupfuls of pancake batter onto the hot metal.

Before I prepare the pancakes, I will wash and hull the strawberries. I will taste one and decide whether or not they need sugar. Since I will probably be eating them with maple syrup I may not sugar the berries unless Mom insists.

I first learned to make these pancakes from a Mark Bittman recipe reprinted in a local newspaper. You can read it here. Then I realized a couple of years later that I could wing it by using leftover polenta or cornmeal mush from dinner and adding basic pancake ingredients. I felt like a genius, but I never would have thought of it had I not made Bittman’s wonderful recipe many times. The pancakes are filling, but not heavy, and have become one of my favorite breakfasts for the warmer months when fresh fruit becomes abundant. I like them best with berries or peaches –any berries, but strawberries are the berries of the moment in my neighborhood.

Food Notes: Blue corn, if you can get it, is wonderful. It contains more protein than yellow or white corn. Also, Monsanto, developer of much genetically-modified corn, reputedly does not bother with blue corn, concentrating its research on yellow hybrids. I don’t know about you, but I would prefer not to ingest Monsanto’s experiments or products if I can avoid doing so. Vanilla adds a lovely flavor to corn, dare I say je ne sais quoi? I urge you to try it next time you make a sweet corn recipe.

Travel Notes: I am currently looking for hotels in Paris. Nothing expensive. Cheap is good. The room can be simple and I don’t care if the building is old. The hotel needs to be safe and near a Metro stop. If anyone has suggestions, or suggestions about how to find what I need please comment below or contact me. Merci beaucoup. — Sharyn

In Northern California spring can start in February and continue through May. First we see daffodils, then flowering pear, plum, crab apple and quince trees. Spring crops come in slowly: green garlic, lettuce, then asparagus, followed by peas. On my last Farmers’ Market visit two weeks ago the strawberries had white shoulders and the grower I like to buy them from (Lucero Farms of Lodi) had not yet taken up a stall, but I had a feeling I would find strawberries today, and there they were, small red Seascape berries with long stems destined for the year’s first strawberry shortcake.

Painting shows a heart-shaped strawberry shortcake and baskets of berries.

Strawberry Shortcake. 8″ x 8″ Gouache and Watercolor Pencil. Sharyn Dimmick

There are many variations of strawberry shortcake: you can make it with angel food cake or lemon pound cake or sponge cake or olive oil citrus cake. I have tried them all, but my favorite recipe for strawberry shortcake is a biscuit base, split and covered with fresh strawberries, served with lightly sweetened whipped cream. To honor the ritual of spring I will use organically grown Farmers’ Market strawberries, and whipping cream from Straus Dairy in Marin County.

I will buy my cream at a local supermarket, but because it is Earth Day I want to think a bit about what it took to produce this traditional spring dessert. Someone had to plant the strawberries, tend them, water them, pick them, bring them to market. Someone had to raise sugarcane and refine it. Someone mined the salt, picked vanilla pods, raised wheat, ground it into flour. Someone had to raise the dairy cow, feed her on grass, milk her. Someone had to separate the cream, sterilize the bottles, fill and cap them. Someone had to drive the cream to the supermarket. Someone had to put it on the shelves. Someone had to drive the bus that takes me from market to market and home again. In a day gone by, members of my family, relatives from a few generations back, might have kept the cow and skimmed the cream and planted the strawberries in Illinois where they farmed, but my parents both moved to California as teenagers and never went back to the Midwest. Celia’s small farm at The Kitchens Garden might be something like the farms my mother knew in her youth, farms with hedgerows, vegetable gardens, small orchards, cows and chickens, diversified crops.

In California I now buy the bulk of my produce from an organic farm eighty-seven and a half miles from where I live. Someone drives to Berkeley each Wednesday and places boxes of vegetables and fruit on a front porch. I take a bus and walk several blocks, load the heavier vegetables into my backpack and the delicate items into a canvas bag. I have no choice in what goes into my produce box: someone at Riverdog Farm decides what is best each week and loads it up. I unpack the box and fold it: the farm driver will collect it the next week. I like the idea that I am getting produce picked that morning or the previous day and I like it that in a small way my food dollars are supporting small, diversified agriculture on a farm that uses organic growing methods: although I cannot farm myself I have farming roots. Small farmers are real to me,  people that raise food and think about how they are raising it. The Capay valley where my produce comes from has many small farms started by former students at U.C. Davis on land that agribusiness did not want.

I shop at the Farmers Market to supplement my produce box. There I can buy a flat of peaches in June, more corn in July, bunches of fresh basil in August, these first spring strawberries in April. Every week I can walk down the center aisle and look to see what has come in, compare prices, sniff the air perfumed by seasonal fruit. I am grateful to live in a state where the growing season is long and next to a city that supports three different farmers’ markets year-round.

Enough. Now it is time to go into the kitchen to make that special shortcake with the first strawberries.

First, shake the cream bottle to redistribute the fat evenly. Then pour the grassy-smelling cream into a small mixing bowl and set it into the refrigerator to chill, along with the beaters. The cream will triple in volume as you whip it, so make sure your bowl is not too small. If you wish, you may season it at this point: I like to add  2 and 1/2 tablespoons of sugar and 1 tsp. vanilla and, sometimes, the barest grating of fresh nutmeg.

While the cream chills, prepare the shortcake:

Preheat the oven to 425.

Sift together 2 cups of flour

1 Tbsp baking powder

1/2 tsp kosher salt

2 Tbsp sugar.

Cut in 1/3 cup unsalted butter (if you use salted butter, omit the kosher salt)

Add 1 cup milk

Stir just until combined.

Put into a buttered cake pan.

Bake for 12 to 15 minutes until lightly browned in spots.

While the shortcake bakes, prepare the strawberries: remove the hulls and stems and then wash berries in a minimum of water. Let them drain in a colander or pat them dry. Taste one. If your berries are ripe and sweet, you need not add anything, but if you are my mother you will insist on adding a few tablespoons of sugar so that the berries give off more juice — it’s your choice since Mom is not in the kitchen with you. You will also whip the cream now. We like ours moderately stiff so that we don’t have to whip it again the next day.

Once the shortcake is out of the oven, split it in half and pile berries between the layers and on top. Serve with whipped cream.

I will return the plastic strawberry baskets to the market next week for re-use (and perhaps buy more strawberries). I will return the cream bottle to the grocery store eventually, collect my deposit and try not to buy more cream for awhile.

Food Notes: Strawberry shortcake features two elemental foods, cream and strawberries. To make a delicious shortcake, start with the best cream and berries you can find: local dairy cream and organically grown berries will give you the best flavor. Some things are worth waiting for and it is better to make this with ripe, red strawberries that have developed their sugars than to use white-capped or green berries. If you cannot get local cream, choose cream from your market that has not been marked “ultrapasteurized.” Ultrapasteurized cream has been heated to a high temperature to give it a longer shelf life and has a cooked taste that you will want to avoid once you have tasted the alternative. We sweeten our cream with white cane sugar to keep the flavor pure, but you are free to use any sweetener you prefer as long as you do not introduce chemical sweeteners. Finally, you may use any sort of cake or biscuit base that you like, but I implore you to bake it yourself and eat it while it is warm from the oven.

Painting shows pear tart tatin and ingredients.

Pear Tart Tatin. 12″ x 12″ gouache. Sharyn Dimmick.

I had a music potluck to go to yesterday. I started thinking Friday night about what I would make: it came down to orange pound cake made with orange juice and zest, a repeat of the St. Patrick’s Day knishes sans Canadian bacon in deference to vegetarian singers, or a pear tart tatin. Those of you who read about our grocery finds a few posts ago will recall that I bought three pounds of Bosc pears. I have roasted pears to eat as dessert and I have included roasted pears in a few winter soups, but I had never before made a tart tatin. I was somewhat swayed by the thought that I had one pie crust waiting in the fridge. I was also swayed by the fact that I greatly prefer pie to cake and I love fruit desserts.

As it turned out, the pie crust in the fridge was a little too crumbly and a little too small and I ended up making a whole new batch: now we have old leftover crust and new leftover crust. Oh well: making and eating things with pie crust does not trouble us in this household.

While I used my Mom’s never-fail pie crust recipe for the tart tatin, I used the method and ingredients for the most part described in Chez Panisse Desserts, with one change, two additions and one error, which may have proved beneficial.

Alice Waters and Lindsey Sher give the ingredients as one 10-inch circle of pie dough or puff pastry, 1/2 cup sugar, 2 Tbsp unsalted butter, about 5 medium Bosc or Winter Neli pears and an optional tablespoon of rum, Cognac, brandy or Armagnac. I used salted butter, eight small Bosc pears, and rum. I added 1/2 Tbsp of vanilla extract and a sprinkling of ginger. Waters and Sher say to bake the tart at 400 degrees, which I would have done, except, despite reading the recipe, I had set my oven at 350.

If you don’t have pie crust on hand, you’ll have to make that first. You will find my Mom’s recipe here. If you make it, you will have three more crusts, or at least two and a half because Mom’s recipe makes four crusts (It is hard to make less with her recipe because it calls for a whole egg).

Once you have gotten your pie crust made, set it to chill in the refrigerator while you prepare the other ingredients. It’s up to you whether you want to peel and core pears first or make caramel first. At any rate, you will be peeling and coring pears. You can use halves or quarters in the tart. I used halves, which looked quite nice. I put the tablespoon of rum and the half-tablespoon of vanilla in the bowl with the peeled, halved pears.

I then got out a cast iron skillet and set it on medium heat. I added the butter and sugar to the skillet and stirred with a wooden spoon until the caramel turned light brown, at which time I removed the pan from the heat and continued to stir. The caramel continues to darken: you keep stirring it so that it turns evenly instead of darkening in any hot spots. Mine came out a lovely, reddish brown.

Place the pears in the caramel in a circle with the narrow ends pointing to the center. I had a small, pear-less circle in the center, which I filled by cutting the last pear into smaller pieces. I put my pears cut-side down, although Alice and Lindsey say to put the rounded side down. You are going to flip this dessert over after it is baked, so, whichever way you do it, it is going to come out the opposite. My brain does not like to think in reversals (it gets confused). Do what you like. When you have got your pears looking all pretty and symmetrical, you are going to put the pastry over the top. Before I did this, I poured the leftover vanilla-rum mixture over the pears and sprinkled them with perhaps 1 tsp powdered ginger. I folded the crust in quarters, then unfolded it over the fruit, tucking the edges down into the sides of the pan since this crust will end up being the tart base. I also, as instructed, pushed the dough gently into the pears — it forms a slight wave pattern, molding around the curves of the pears. Cut a few slits in the crust and transfer the tart to your hot (or not so hot) oven.

I checked my tart after 30 minutes — that’s when I discovered my temperature error: plenty of browned juices bubbled up, but the crust was not brown. I cranked the oven up to 400 and let the tart bake for another 20 minutes until the crust was properly browned. My error with the oven temperature may have caused deeper caramelization of the fruit, which I happen to like, and had no ill effects on the caramel or the crust, save needing extra time for browning.

When the crust has browned to your satisfaction, remove the tart from the oven and let it sit for a few minutes — the pan will be really hot. When you are ready for the next step, take a plate larger than your skillet, place the plate on top of the pan and carefully invert the skillet onto the plate. With any luck, your tart will come out whole. If a pear or two get left behind, just use a spoon to transfer them back to their place on the tart. If you have lost a bit of crust, you will have the pleasure of sampling the caramel-infused crust: the caramel layer transforms basic pie crust into a new delight.

Mom dug out the top of a popsicle mold, which we plopped in the center of the tart to hold the wrappings away from the fruit. I wrapped the tart in two layers of aluminum foil and carted it off on the bus in the rain to my friend Elaine’s house. The singers consumed every scrap of the tart. Toni had three pieces. Elaine, who does not like Bosc pears, had two. Elaine said she would like the tart made with stone fruit. I said I thought it might be delicious with fresh figs. We have to wait for those fruits, but some pears are in season now. I was pleased with how easy it was to make a dessert that had intimidated me (the caramel, the flipping, the careful arrangement of the fruit, would the crust withstand the weight of the tart and all of that caramel? Would it leak?). Trust me, friends — if I can do it, you can do it.

Food Notes: If you are afraid of pie crust, you can also make this with frozen puff pastry. I recommend, however, that you visit your nearest crust expert to overcome this fear. Most pie bakers would be glad to help you learn to make pie crust.